todoessential maintenance#brakes#inspection#safety
Inspect and Upgrade Braking System
Given the age of the 1967 Ford Mustang, it's crucial to inspect and potentially upgrade the braking system to ensure safety and reliability. This includes checking the brake pads, rotors, lines, and possibly converting to a modern disc brake system if not already equipped.
- Updated
- May 6, 2026
Parts
Wilwood Dynalite Front Brake Pad Set (for Wilwood Classic Front Disc Kit)Part number: 150-9137KManufacturer or supplier: Demon Tweeks (UK/EU shipping)Quantity: 1
BP-10 compound — street/track compound matched to Wilwood calipers already being fitted. Confirm caliper model from your Wilwood kit to ensure pad shape match (D154 or similar). Demon Tweeks ships efficiently to NL.
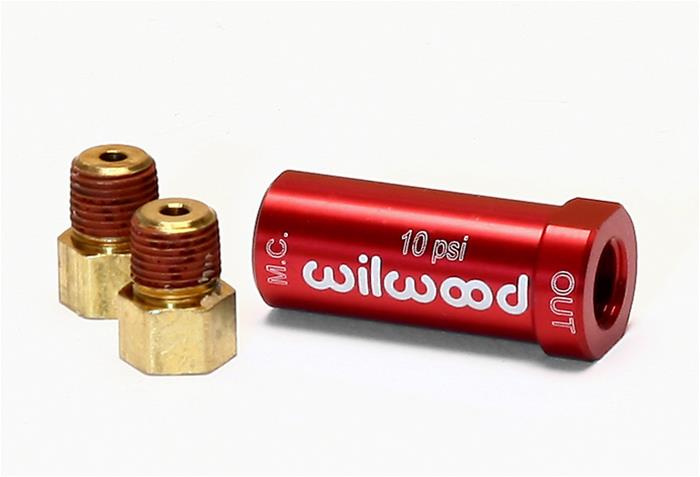
Adjustable Brake Proportioning Valve — Disc/Drum (front disc, rear drum)Part number: 260-13783Manufacturer or supplier: Summit Racing (ships to NL)Quantity: 1
Essential for the disc/drum conversion — balances front disc bias against the stock rear drums. Adjustable type allows fine-tuning on the road. Summit Racing ships internationally to the Netherlands with reasonable lead times.
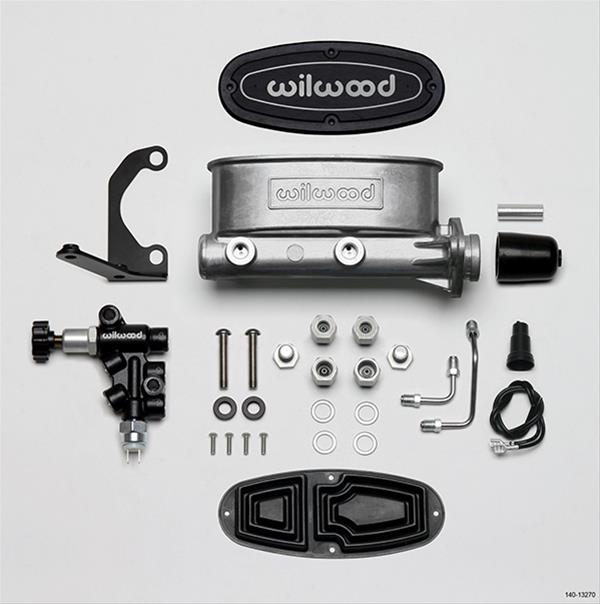
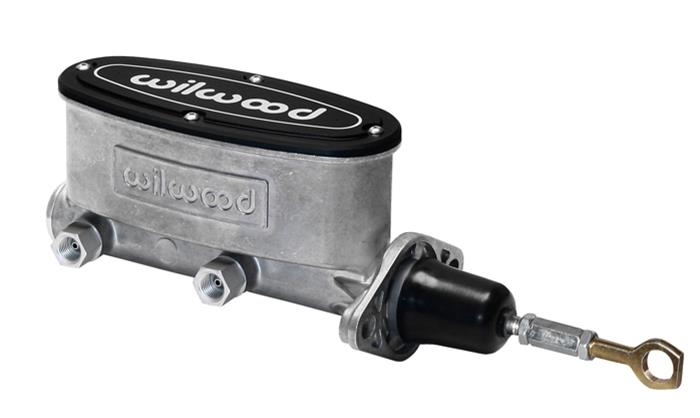
Wilwood Tandem Master Cylinder 1-1/8" Bore (disc/drum, remote reservoir)Part number: 260-6766Manufacturer or supplier: Wilwood Direct / Summit RacingQuantity: 1
Matched to Wilwood front disc conversion kits on classic Mustangs. 1-1/8" bore suits disc/drum split. Technical data shows master cylinder is 'new to be installed' — this is the correct Wilwood complement to the Classic Front Disc Kit already chosen.
Stainless Steel Braided Brake Line Kit — 1967 Mustang Front (pair)Part number: H0606Manufacturer or supplier: Classic Tube / AutoDoc NLQuantity: 1
Stainless braided hoses replace the rubber front flex lines as part of the disc conversion — reduces pedal sponginess and resists heat expansion. AutoDoc NL stocks a range of classic American car brake lines and ships within NL next day. Confirm fitting end sizes match Wilwood caliper banjo (typically 10mm x 1.0).
Rear Drum Brake Shoe Set — 1967 Ford Mustang (9" or 10" rear)Part number: GS0567Manufacturer or supplier: AutoDoc NLQuantity: 1
Rear brake condition is listed as unknown — fresh shoes are low-cost insurance before the car goes back on the road. 1967 Mustang rear drums are typically 9" (6-cylinder) or 10" (V8) — confirm drum size before ordering. AutoDoc NL is ideal for sourcing and delivers quickly within the Netherlands.
completedessential maintenance
Fix Intake Vaccum leak
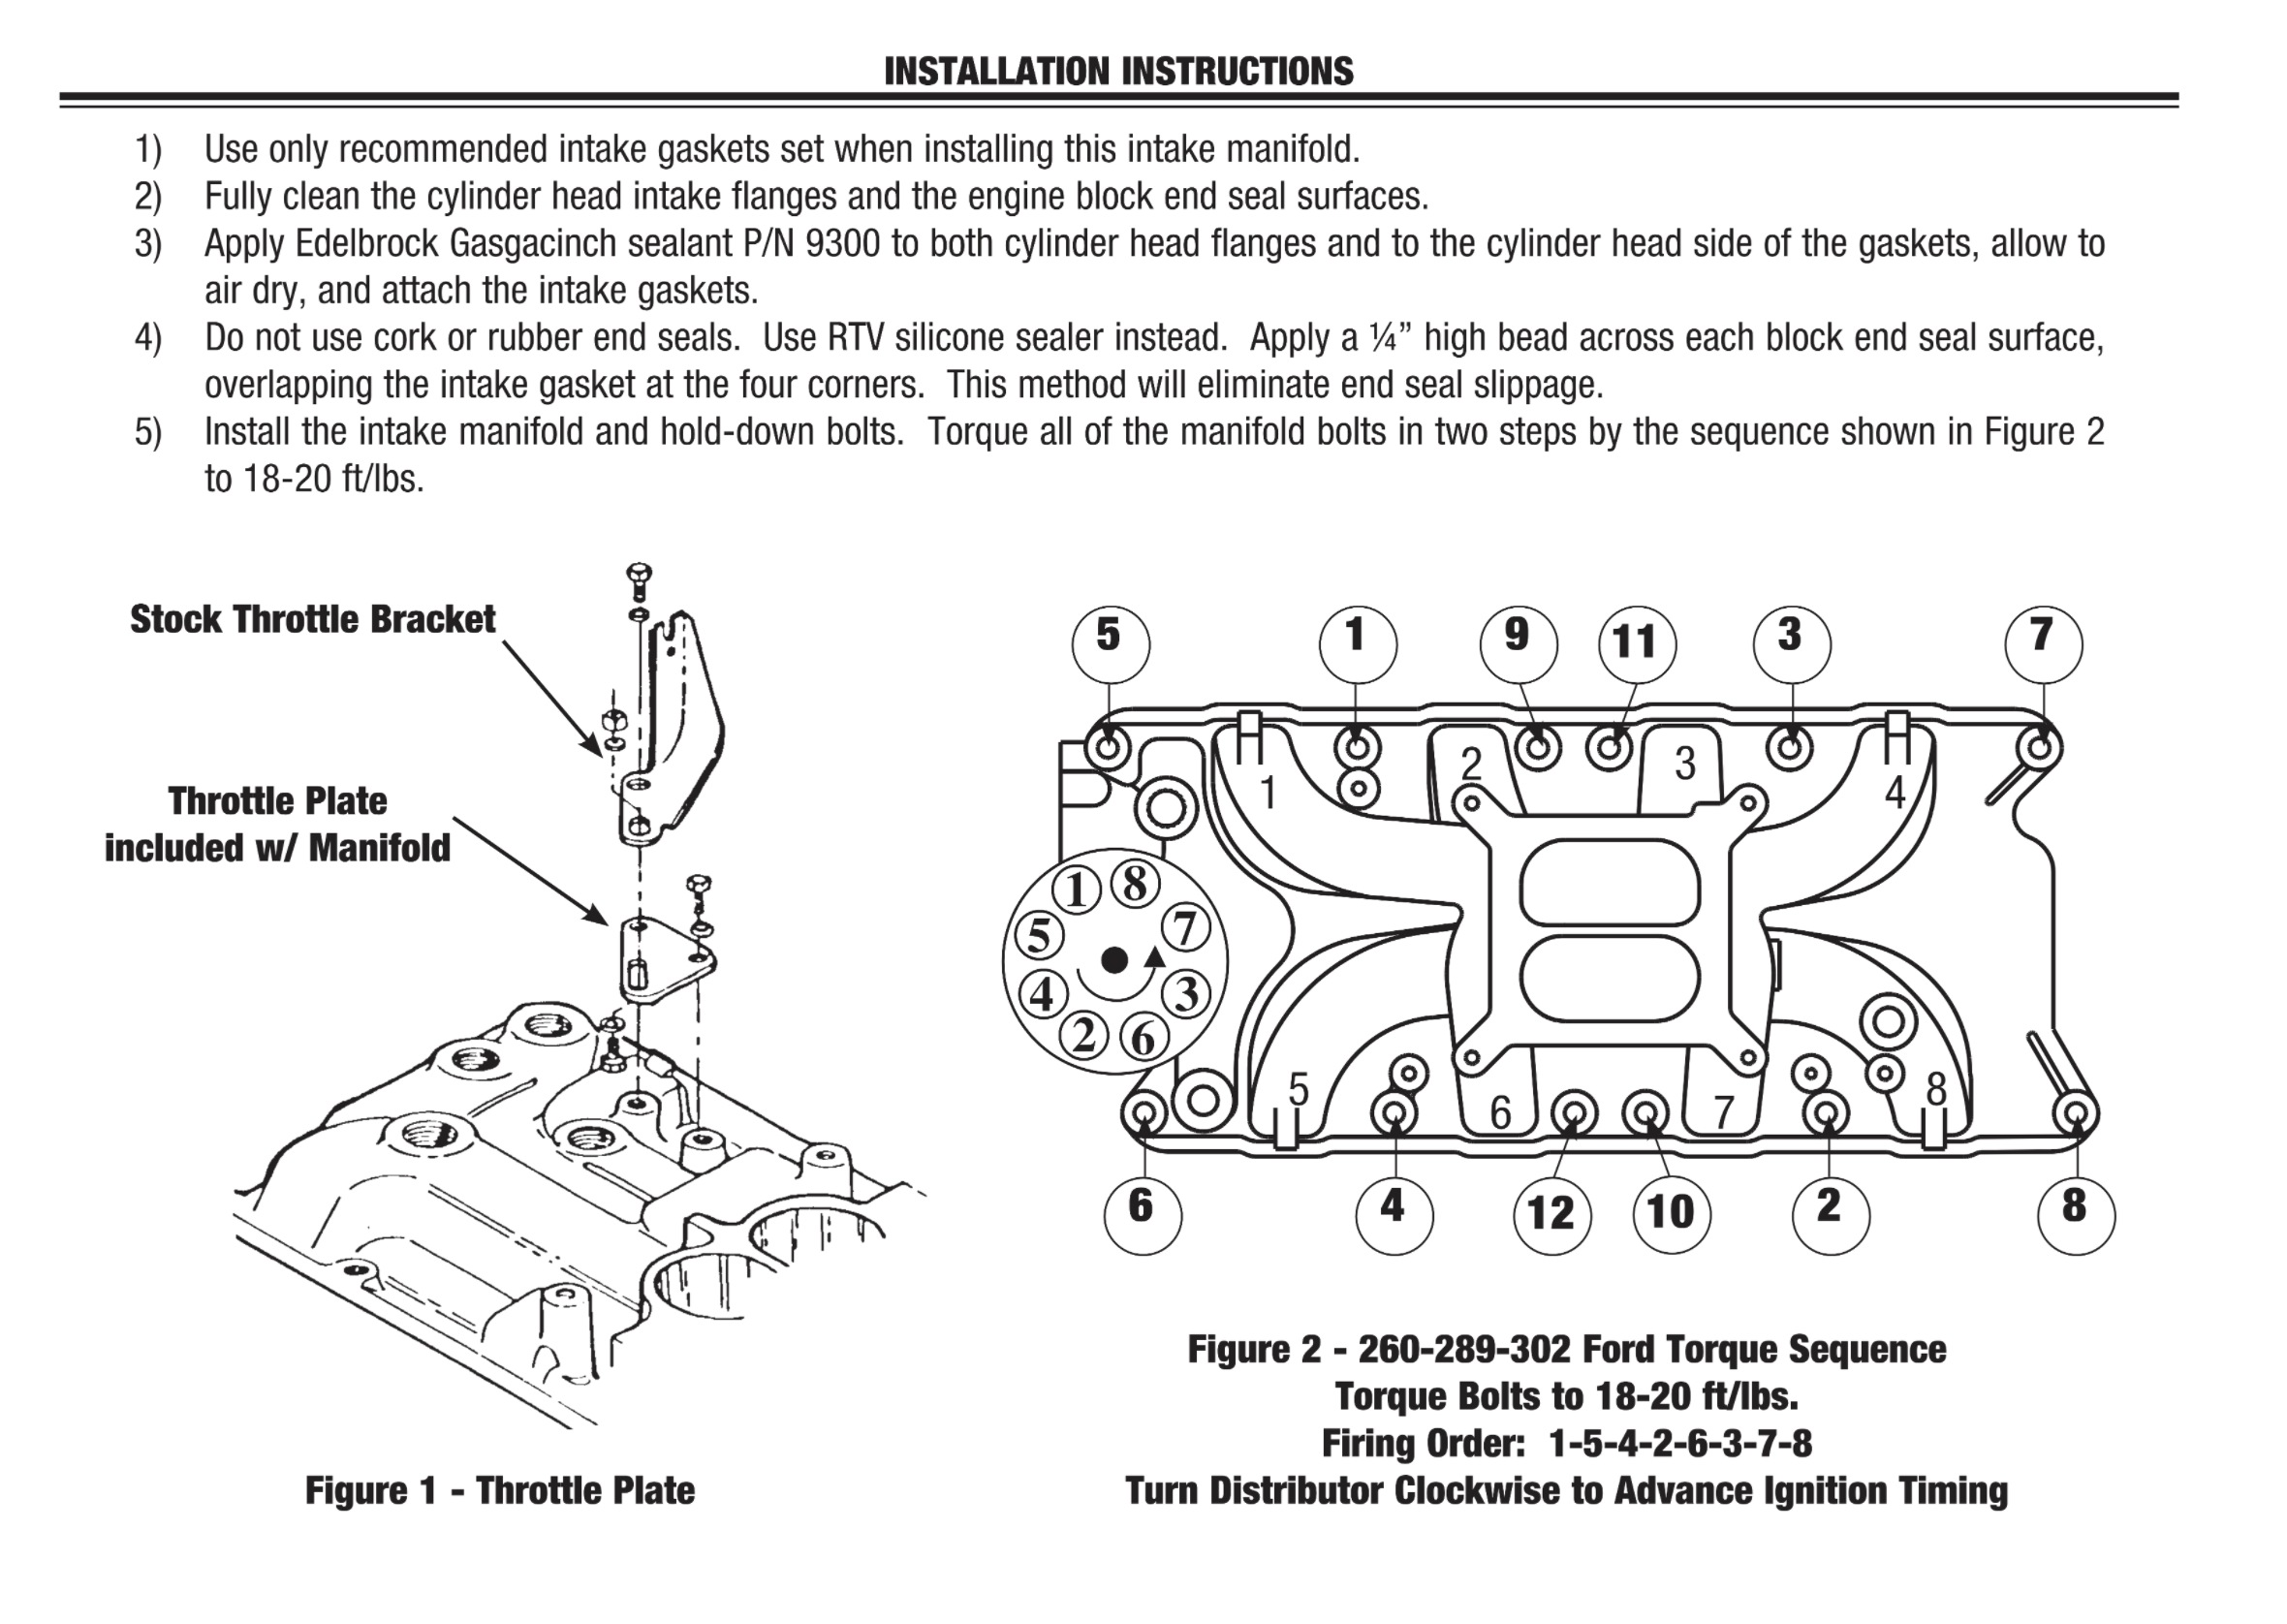
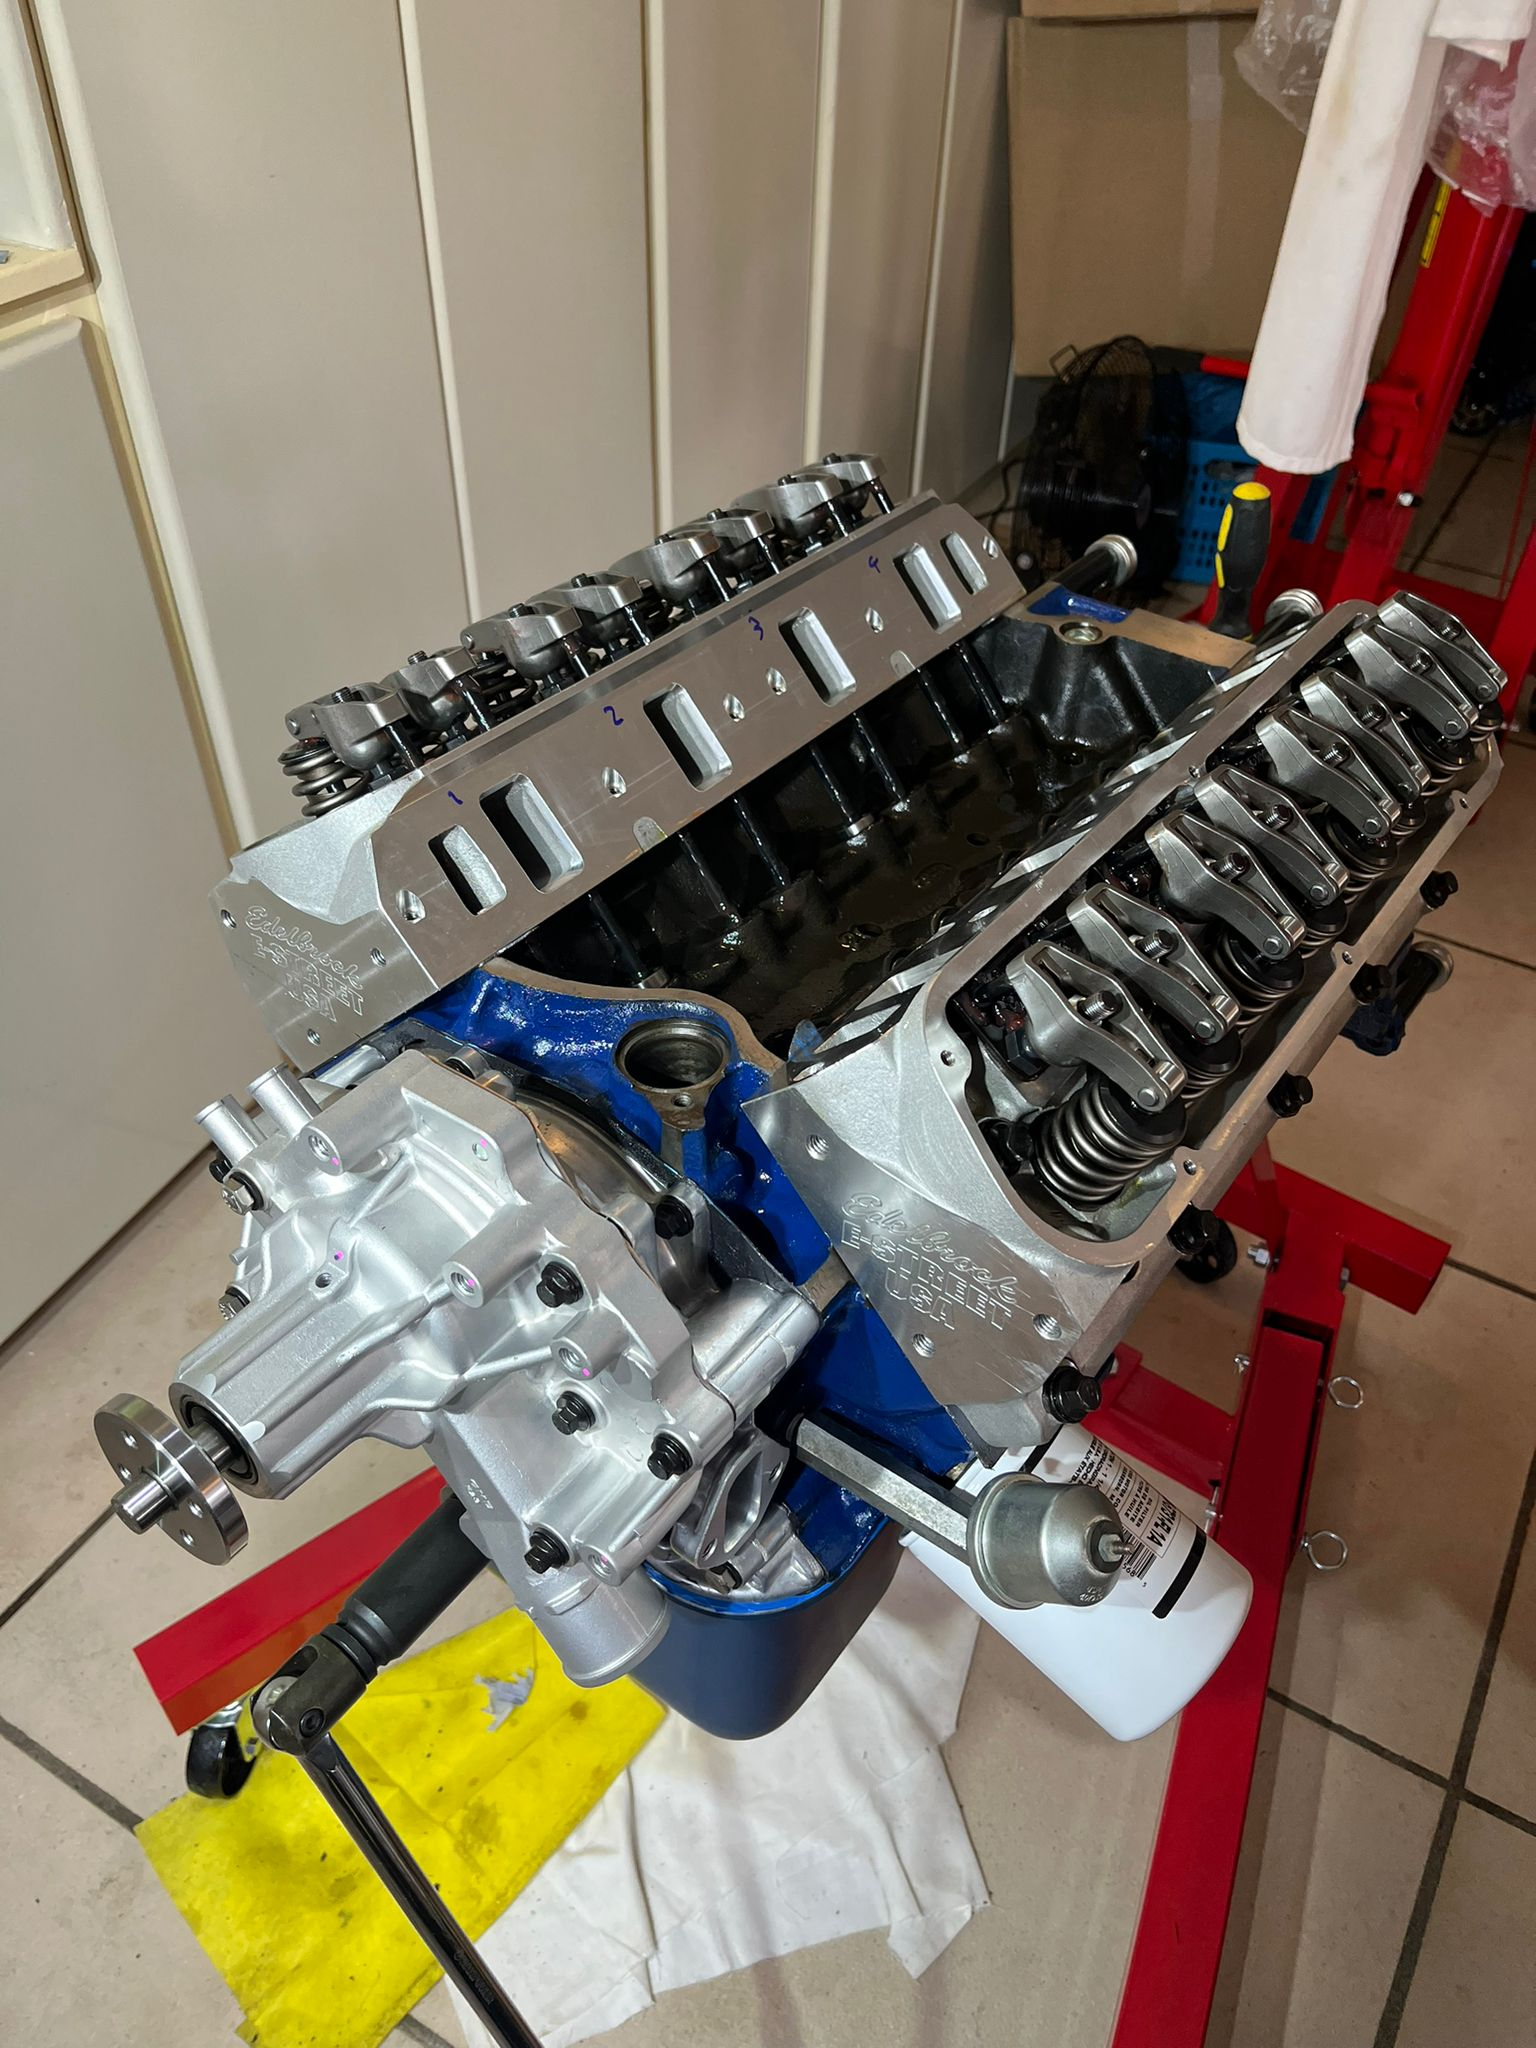
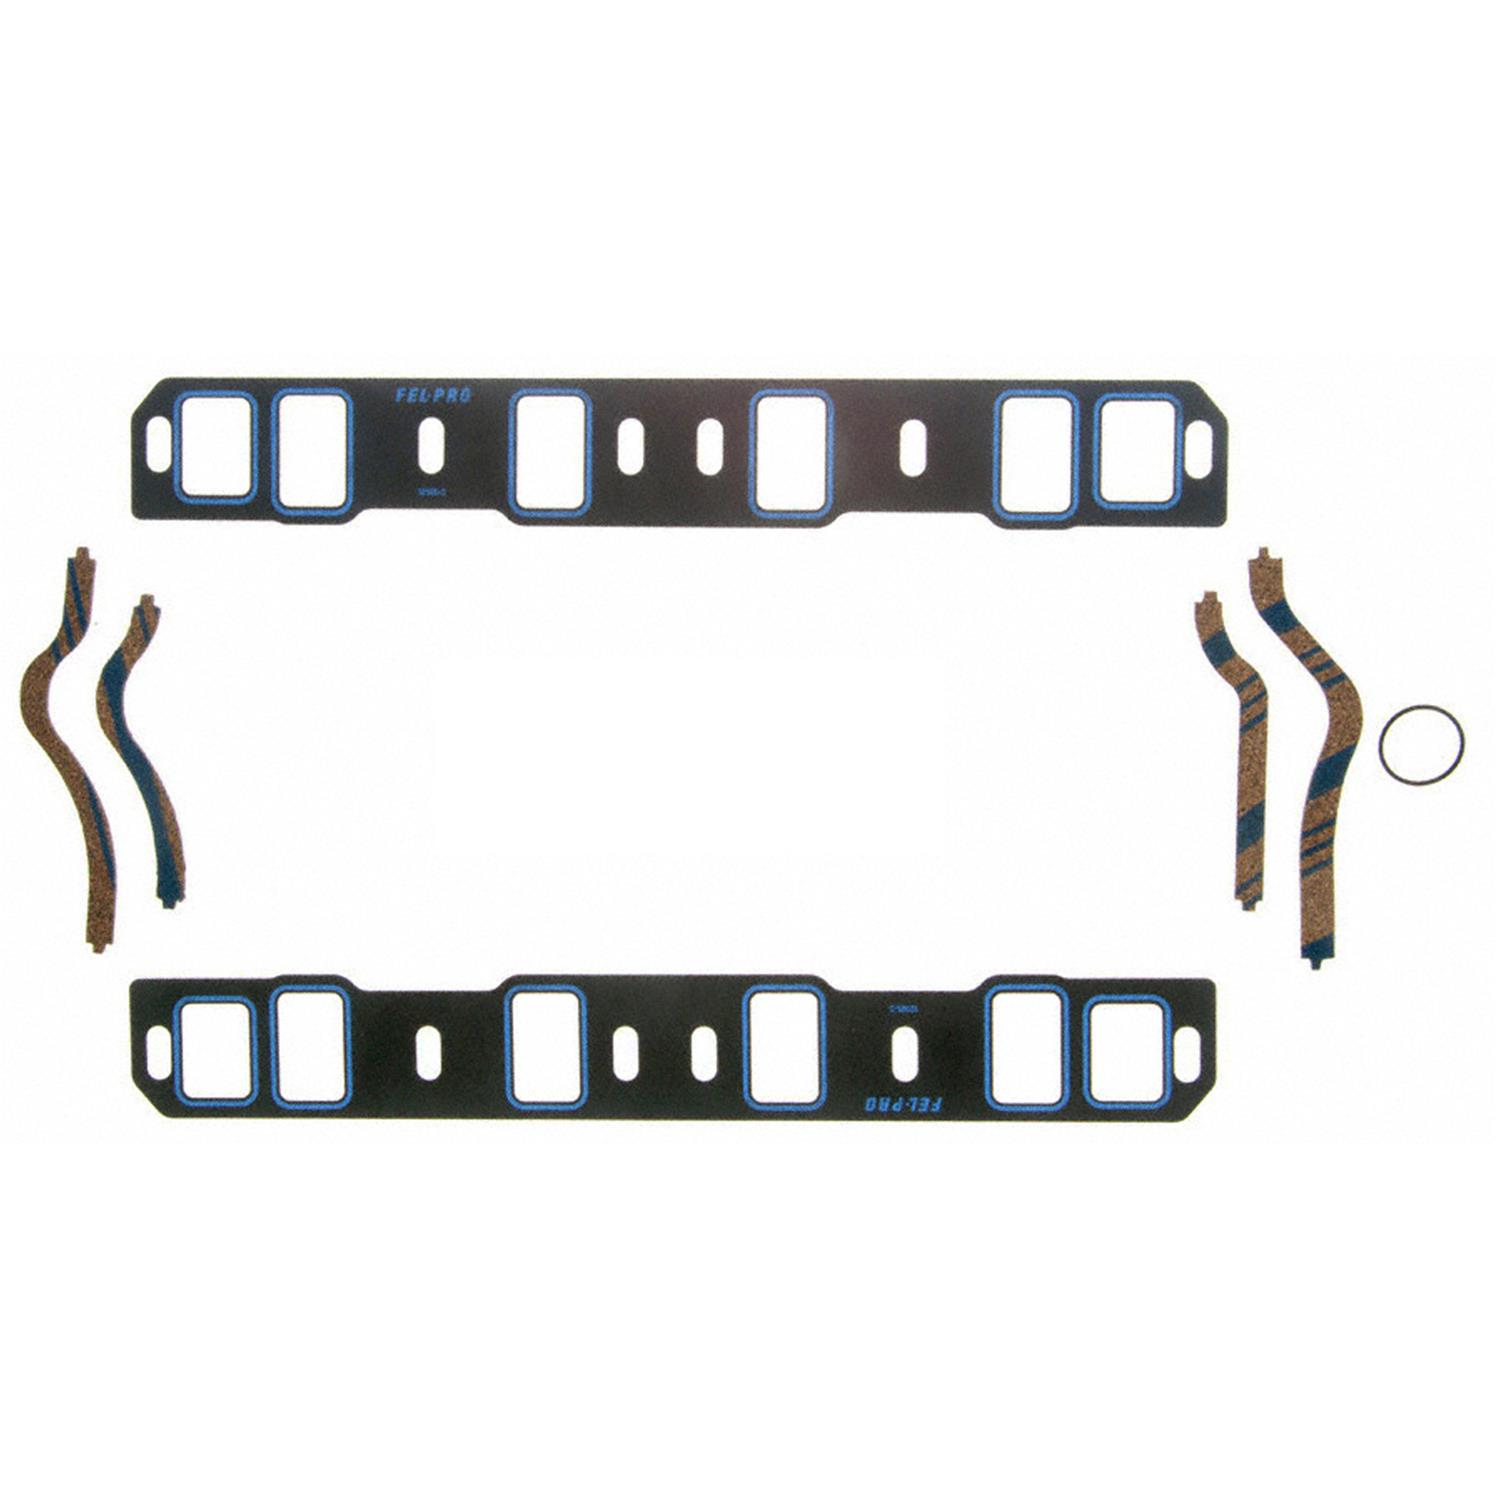
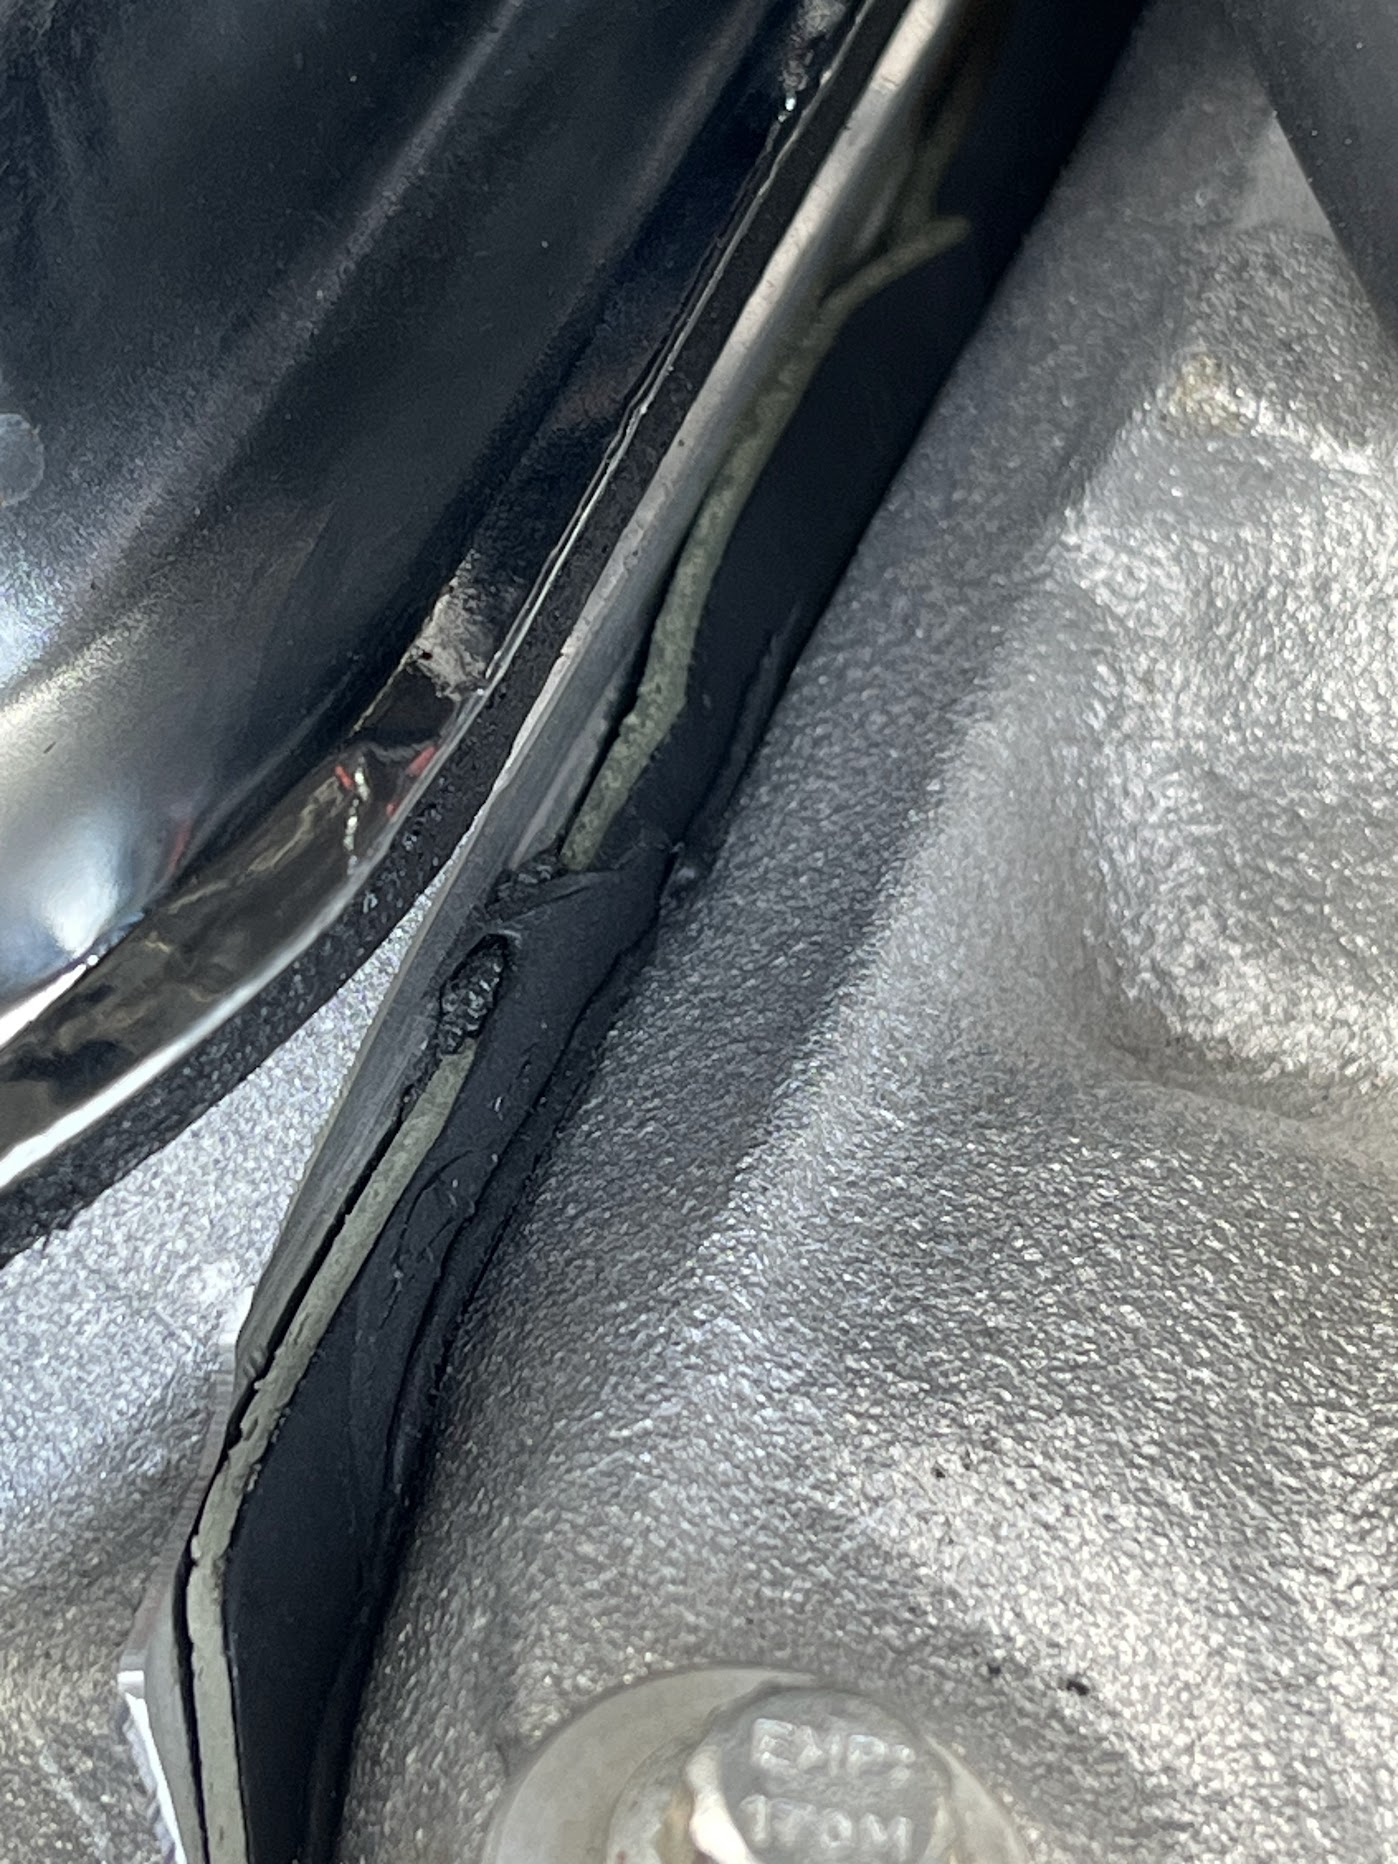
I found a prolem on the front passenger side intake to head issue - the rpm spike massively when this are is sprayed with carb cleaner. i think i may have to remove and remount the intake
https://photos.app.goo.gl/pPSUTESPBrFXziXZA
- Updated
- Apr 22, 2026
todocustom improvement
Front Drum to Disc conversion
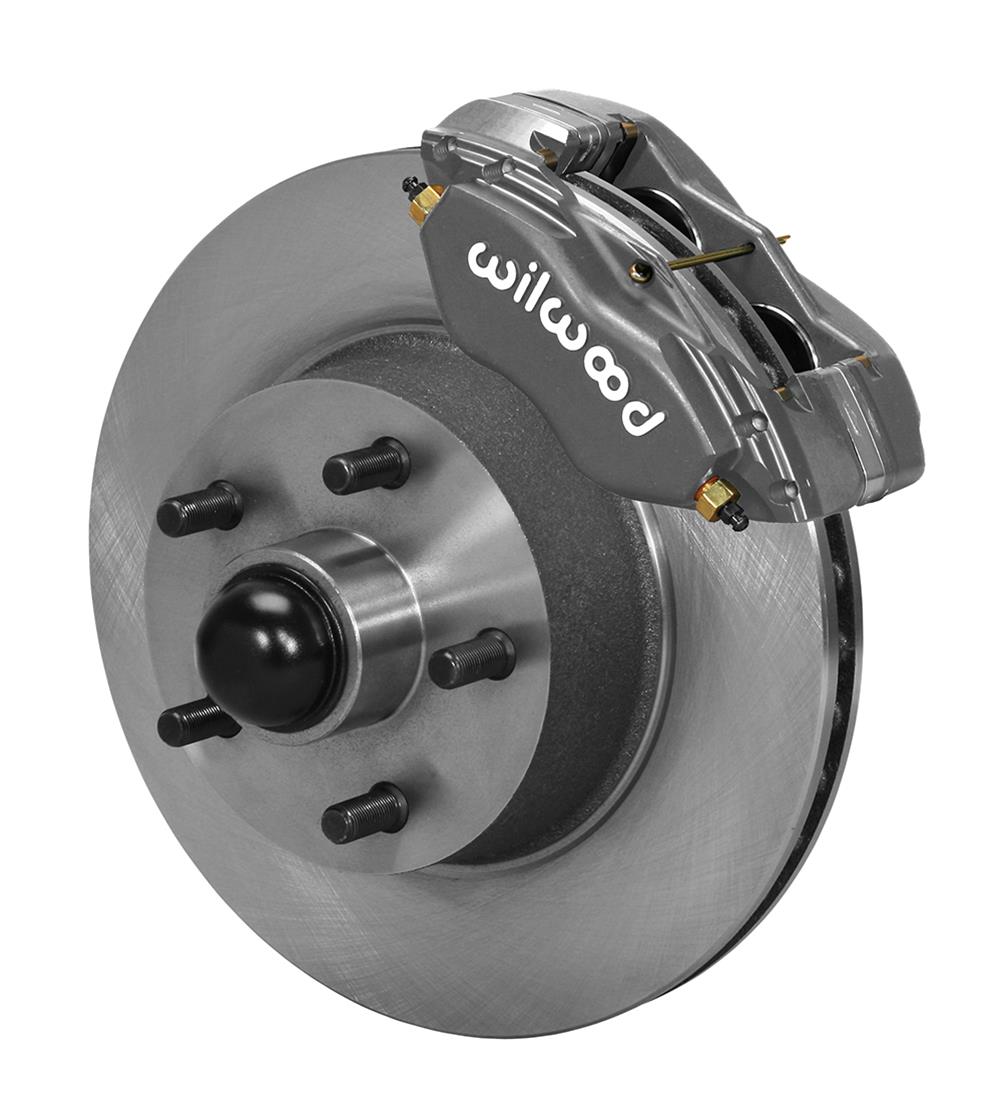
I have a wilwood classic fron disc kit
new master cylinder
need to drop the front drums install the discs replace the master, run new lines, install the proportioning valve etc
- Updated
- May 14, 2026
completed
Install exhaust tips and cut openings in rear valance
Installed exhaust tips through the rear valance and made the required cutouts in the valance. The finished result looks excellent.
- Updated
- Aug 30, 2026
completed
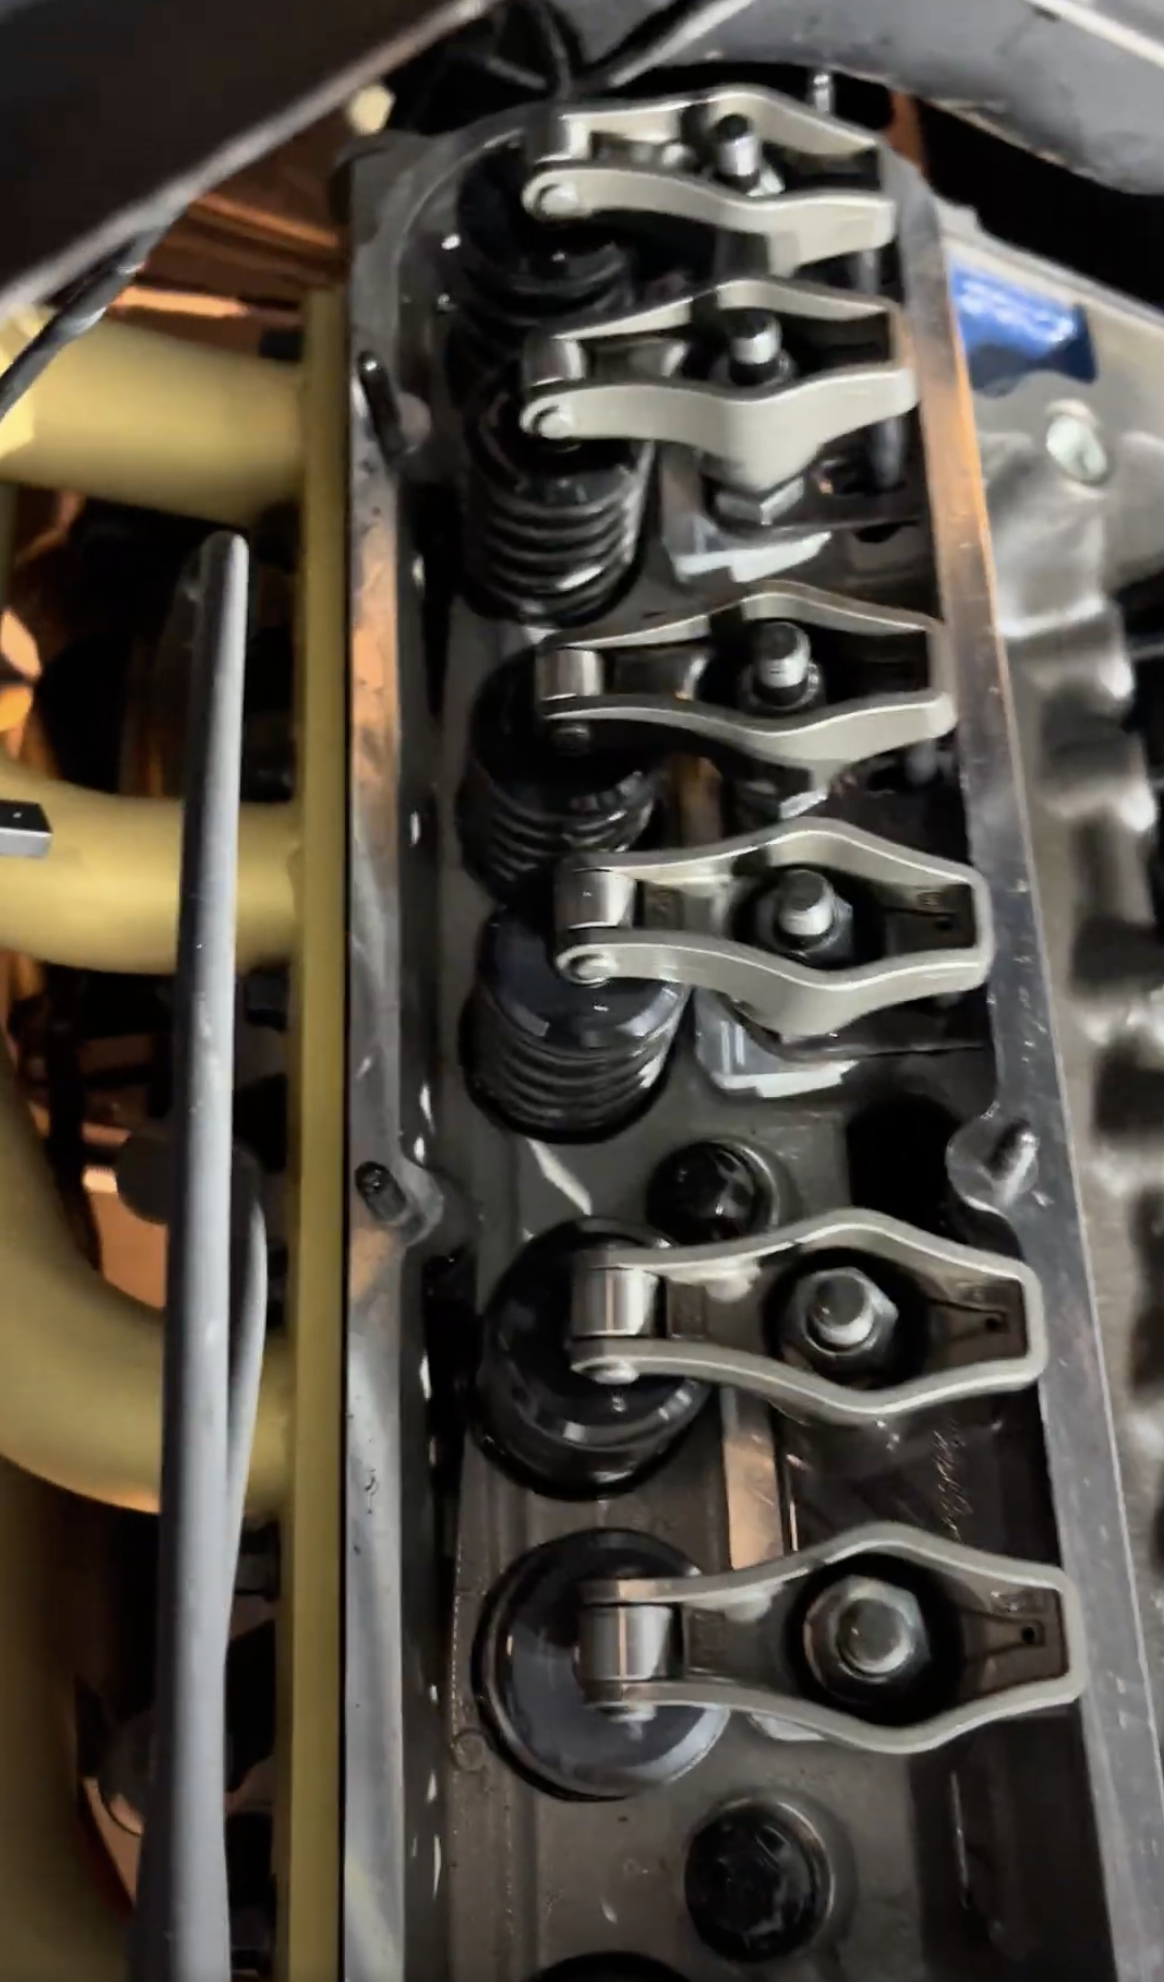
Check, reset valve lash
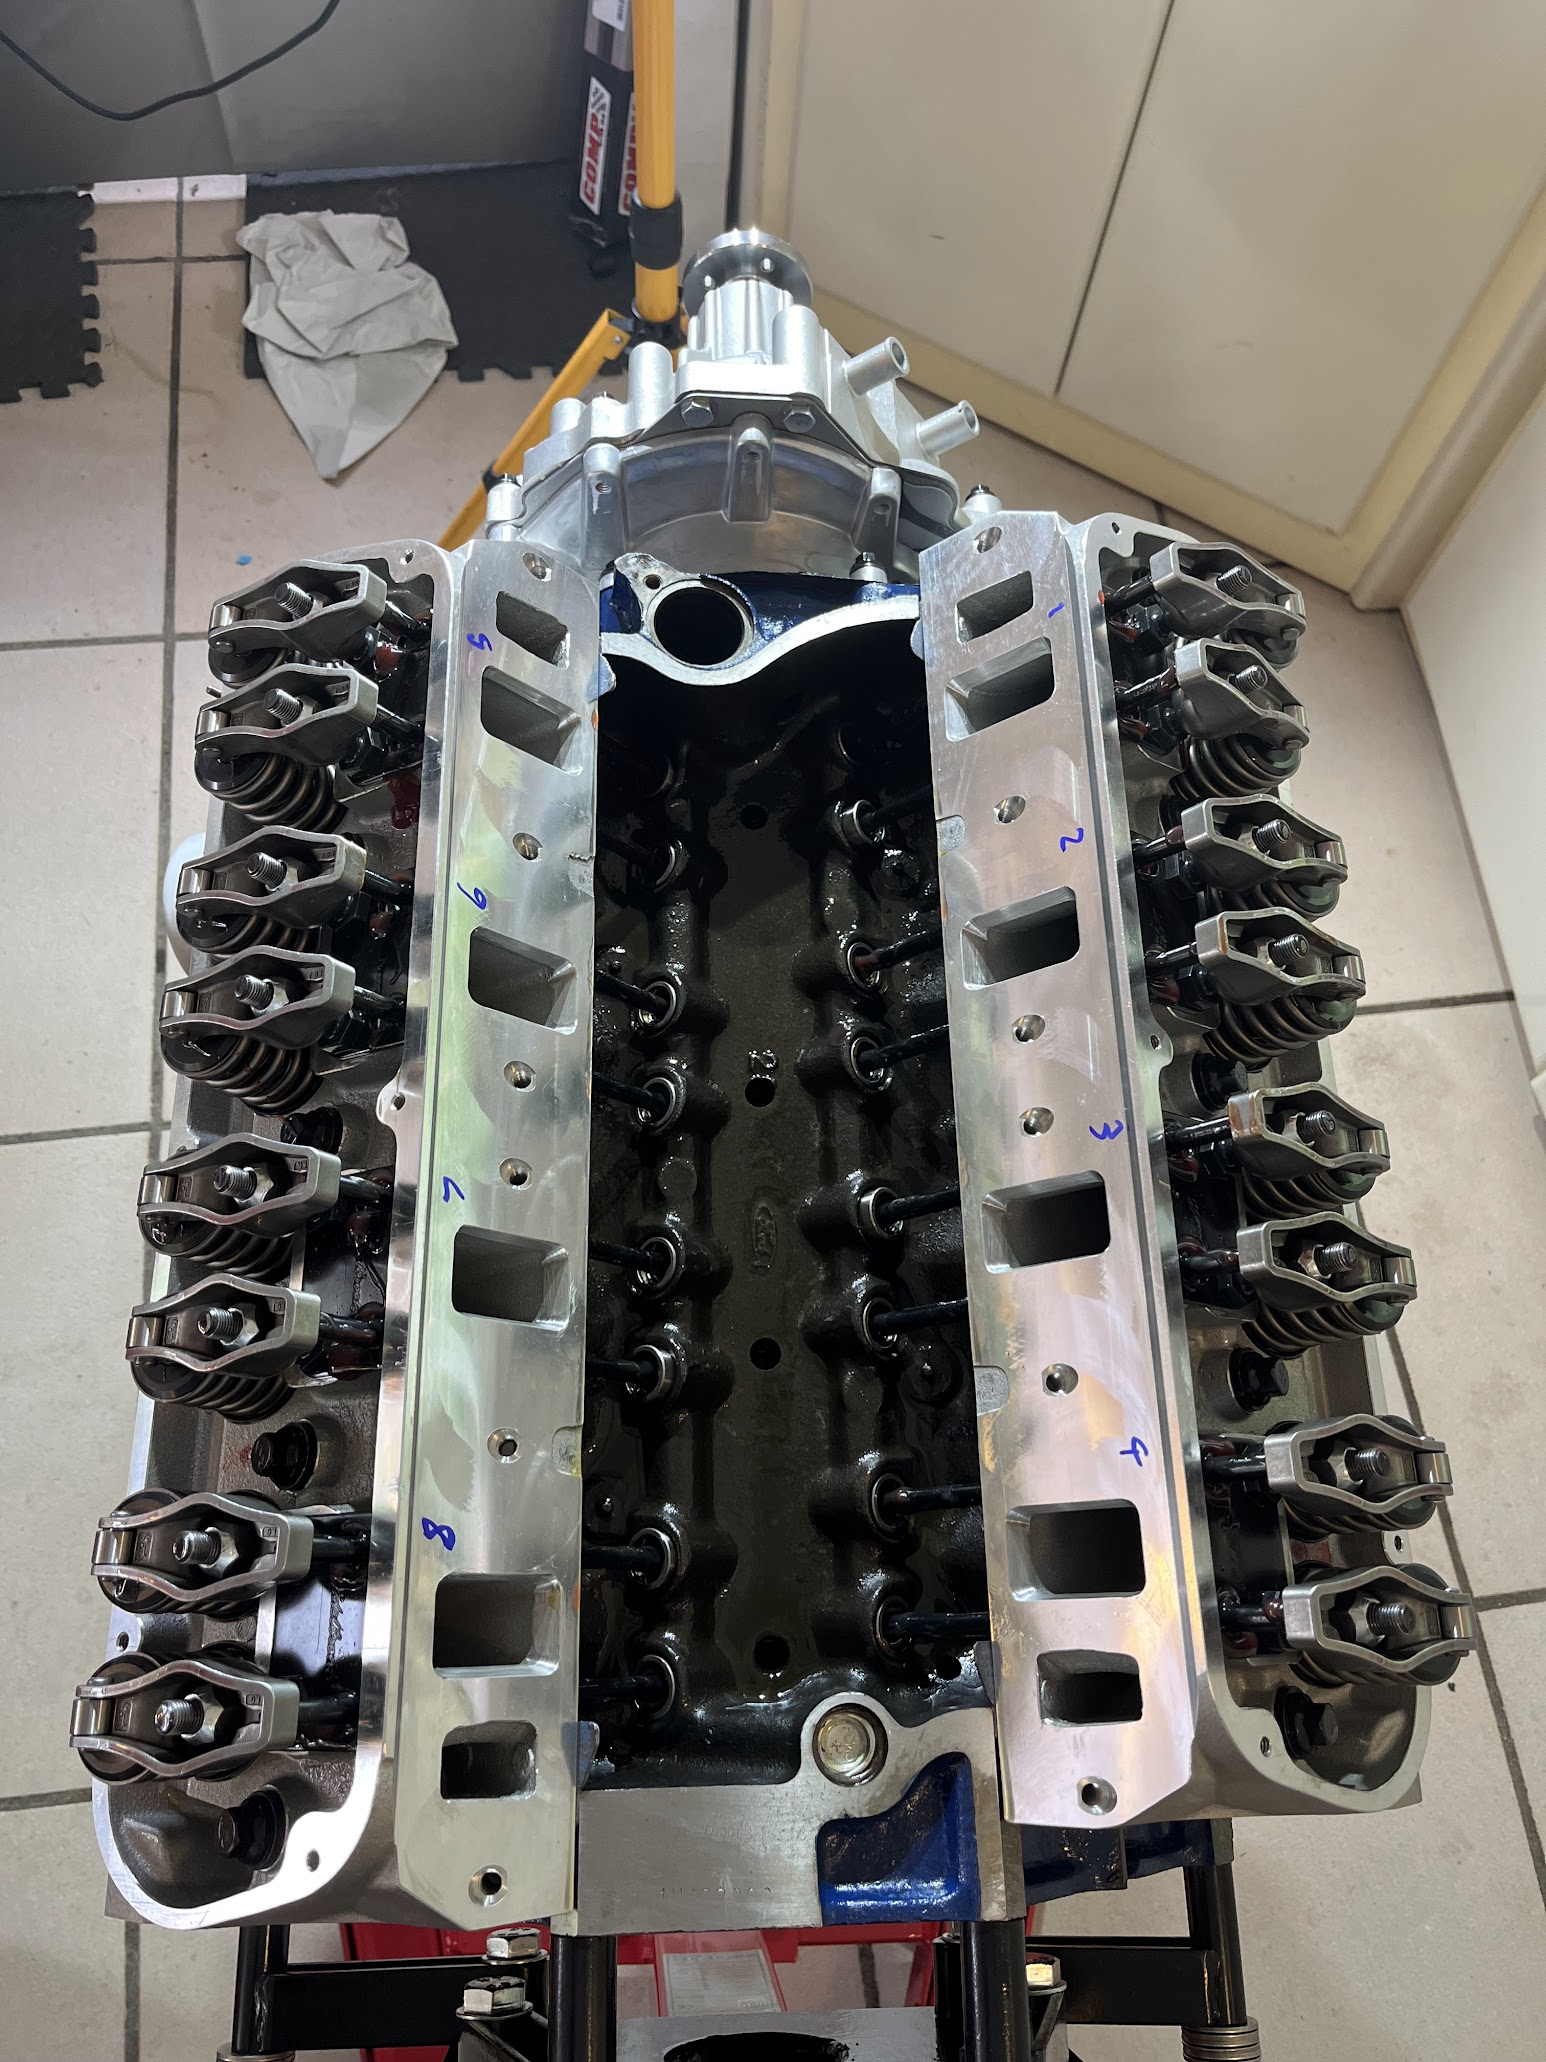
I thought that now that I have the intake off to cure a vaccum leak, it might be worth doing the valve lash check - the motor has done about 1000-2000 kms since the rebuild
- Updated
- Apr 19, 2026
completedtuning
ReTune Carb after vacuum leak fix
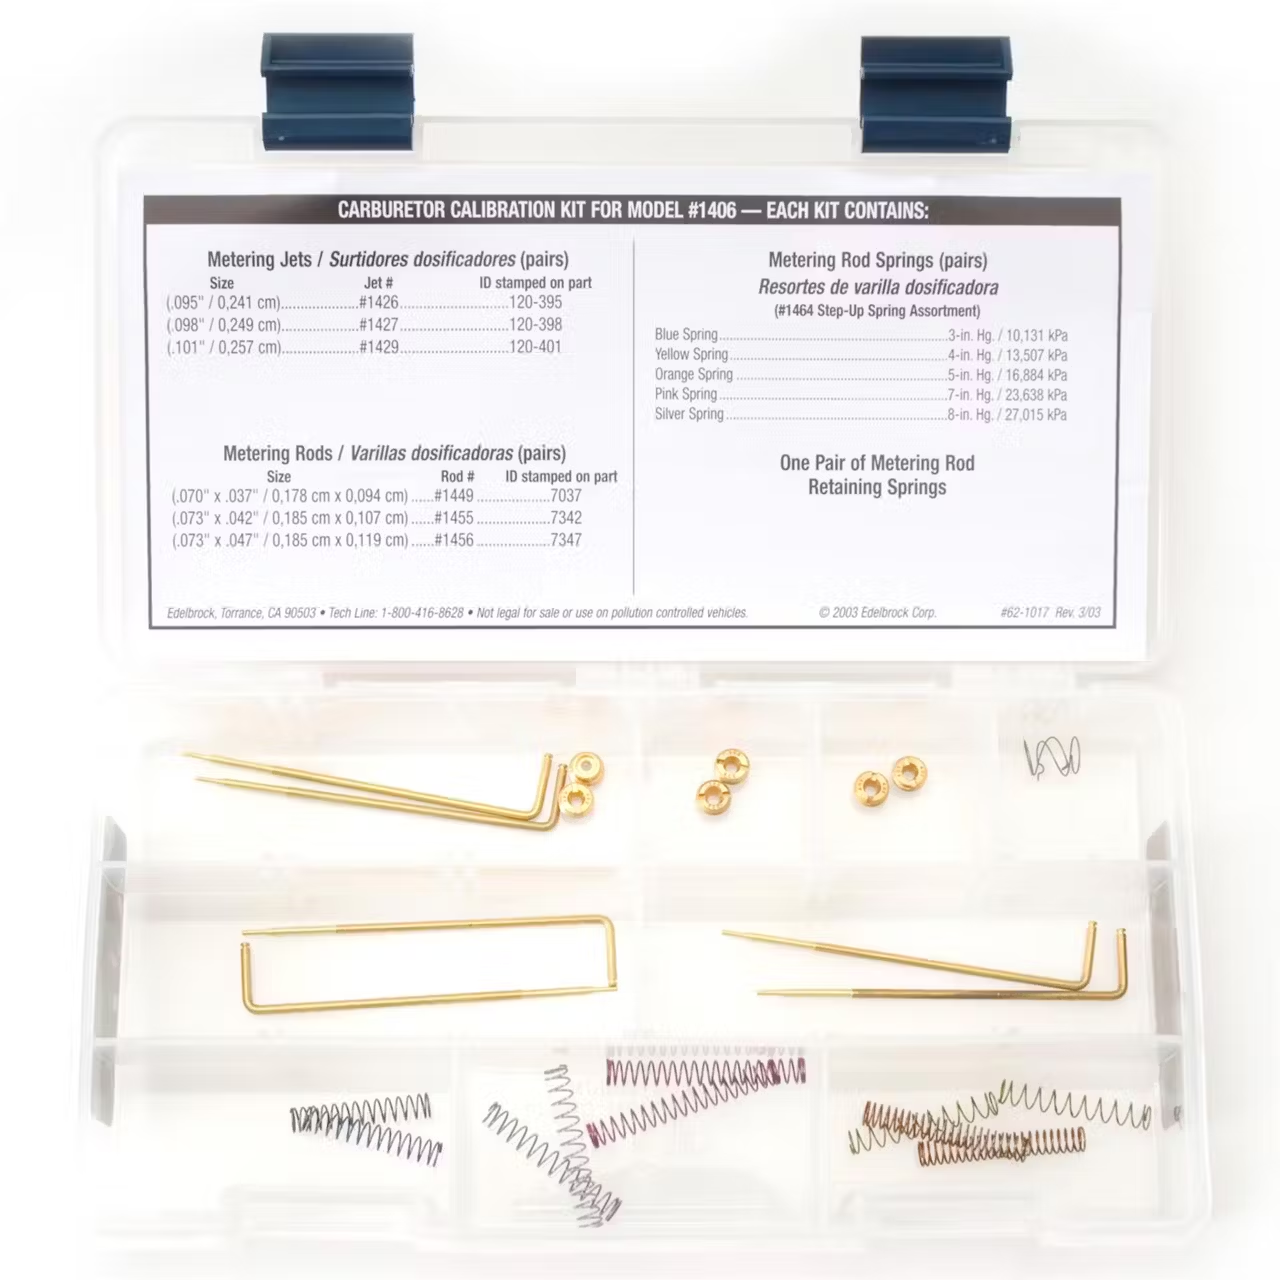
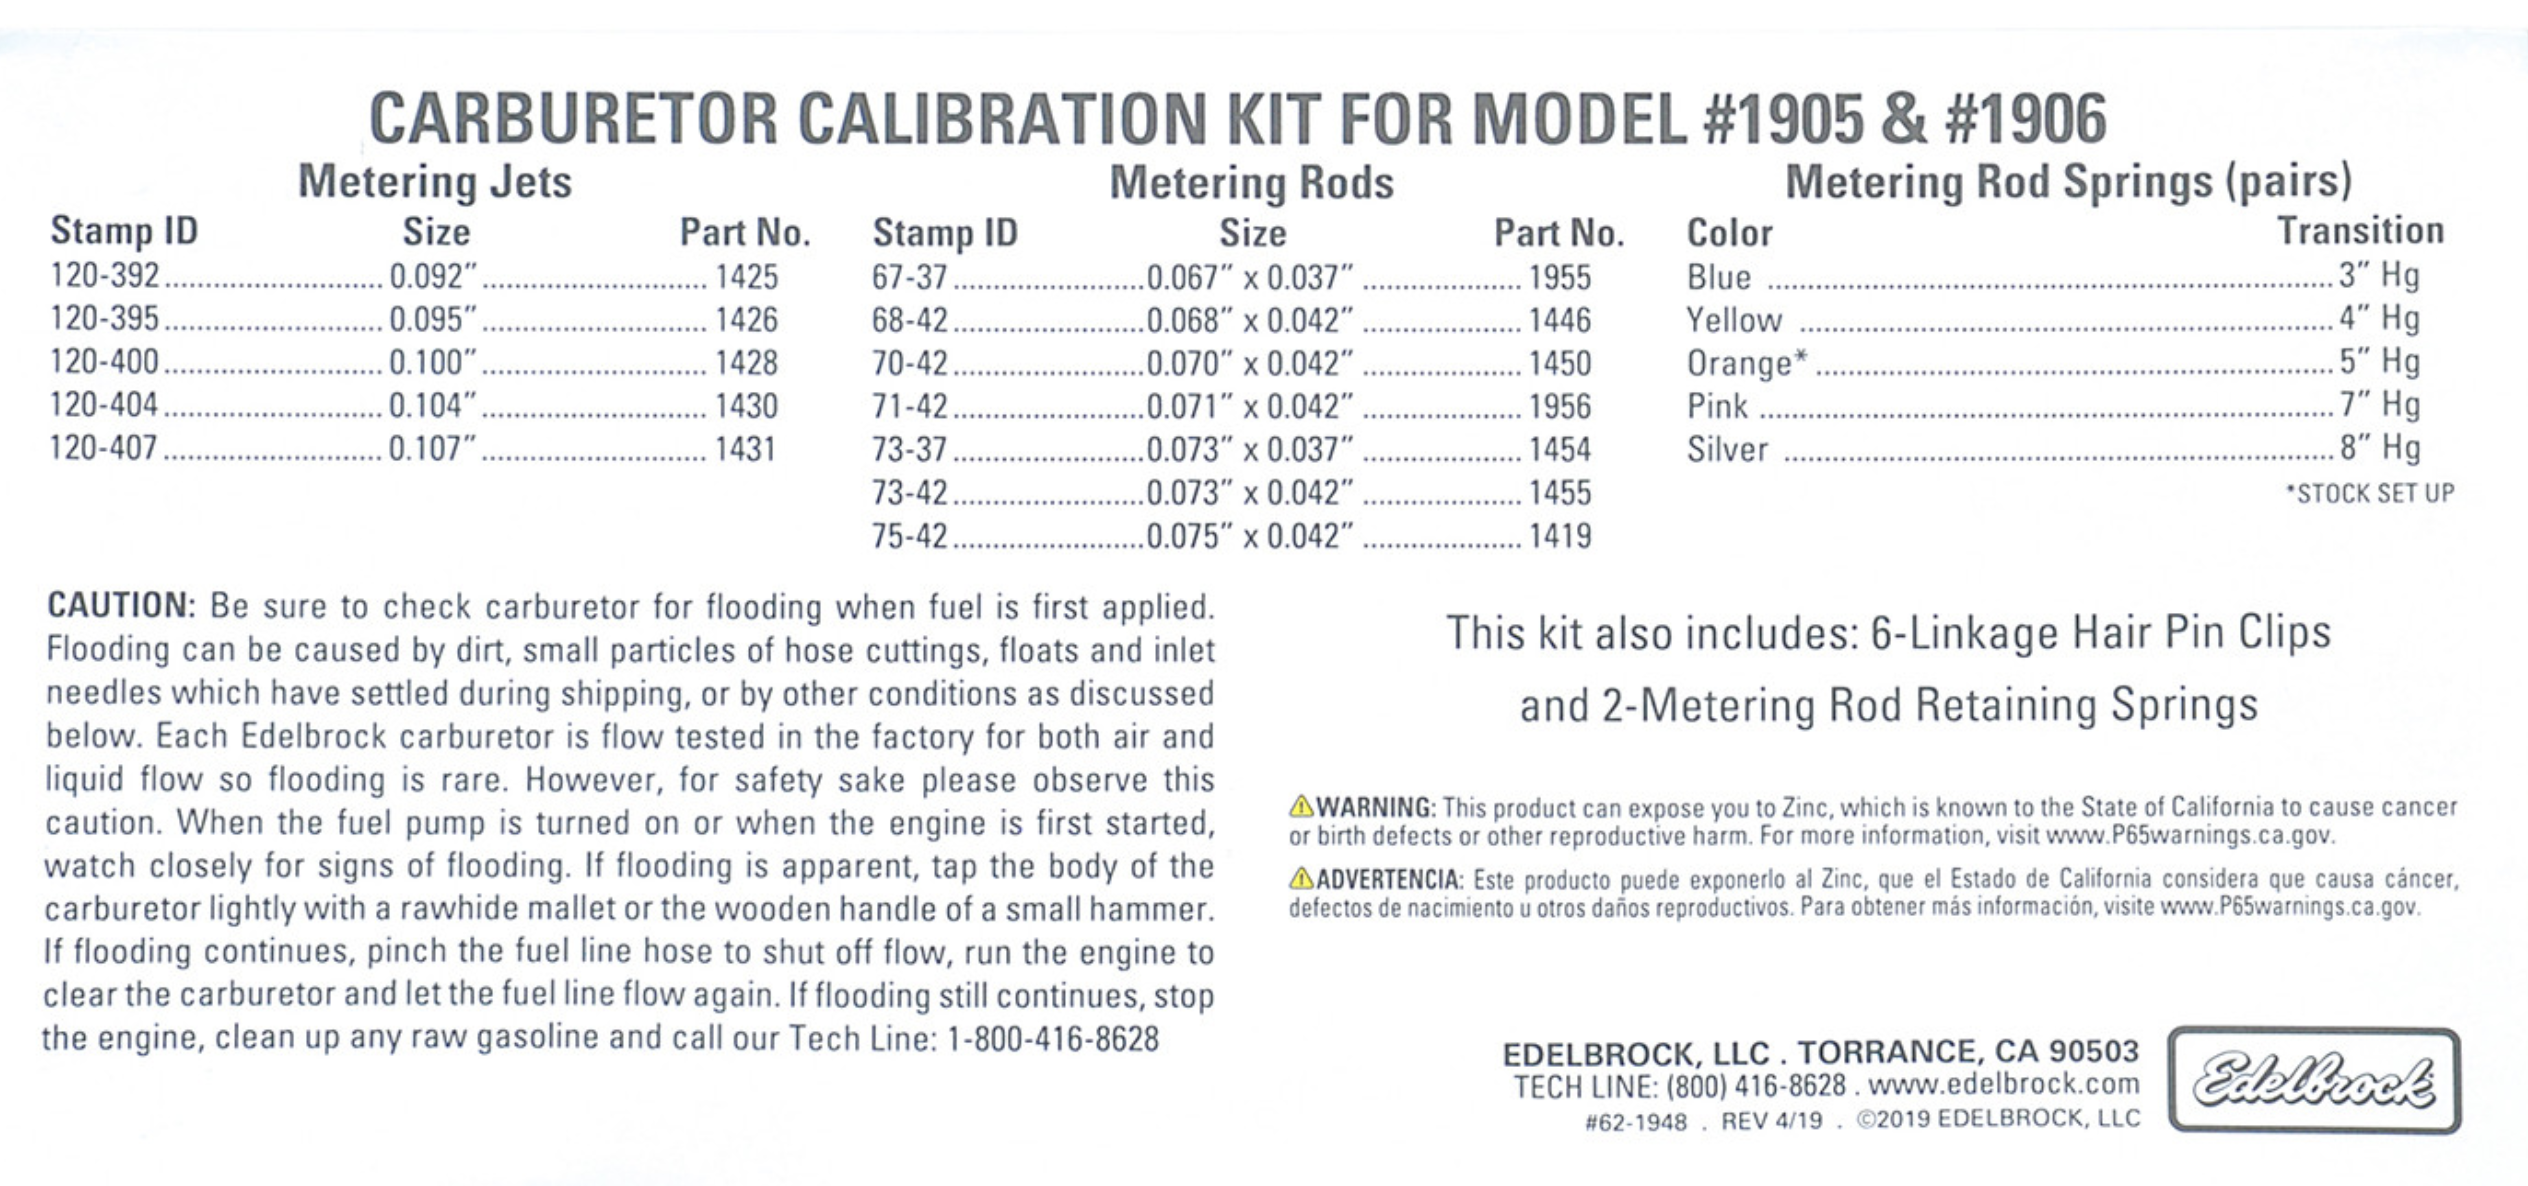
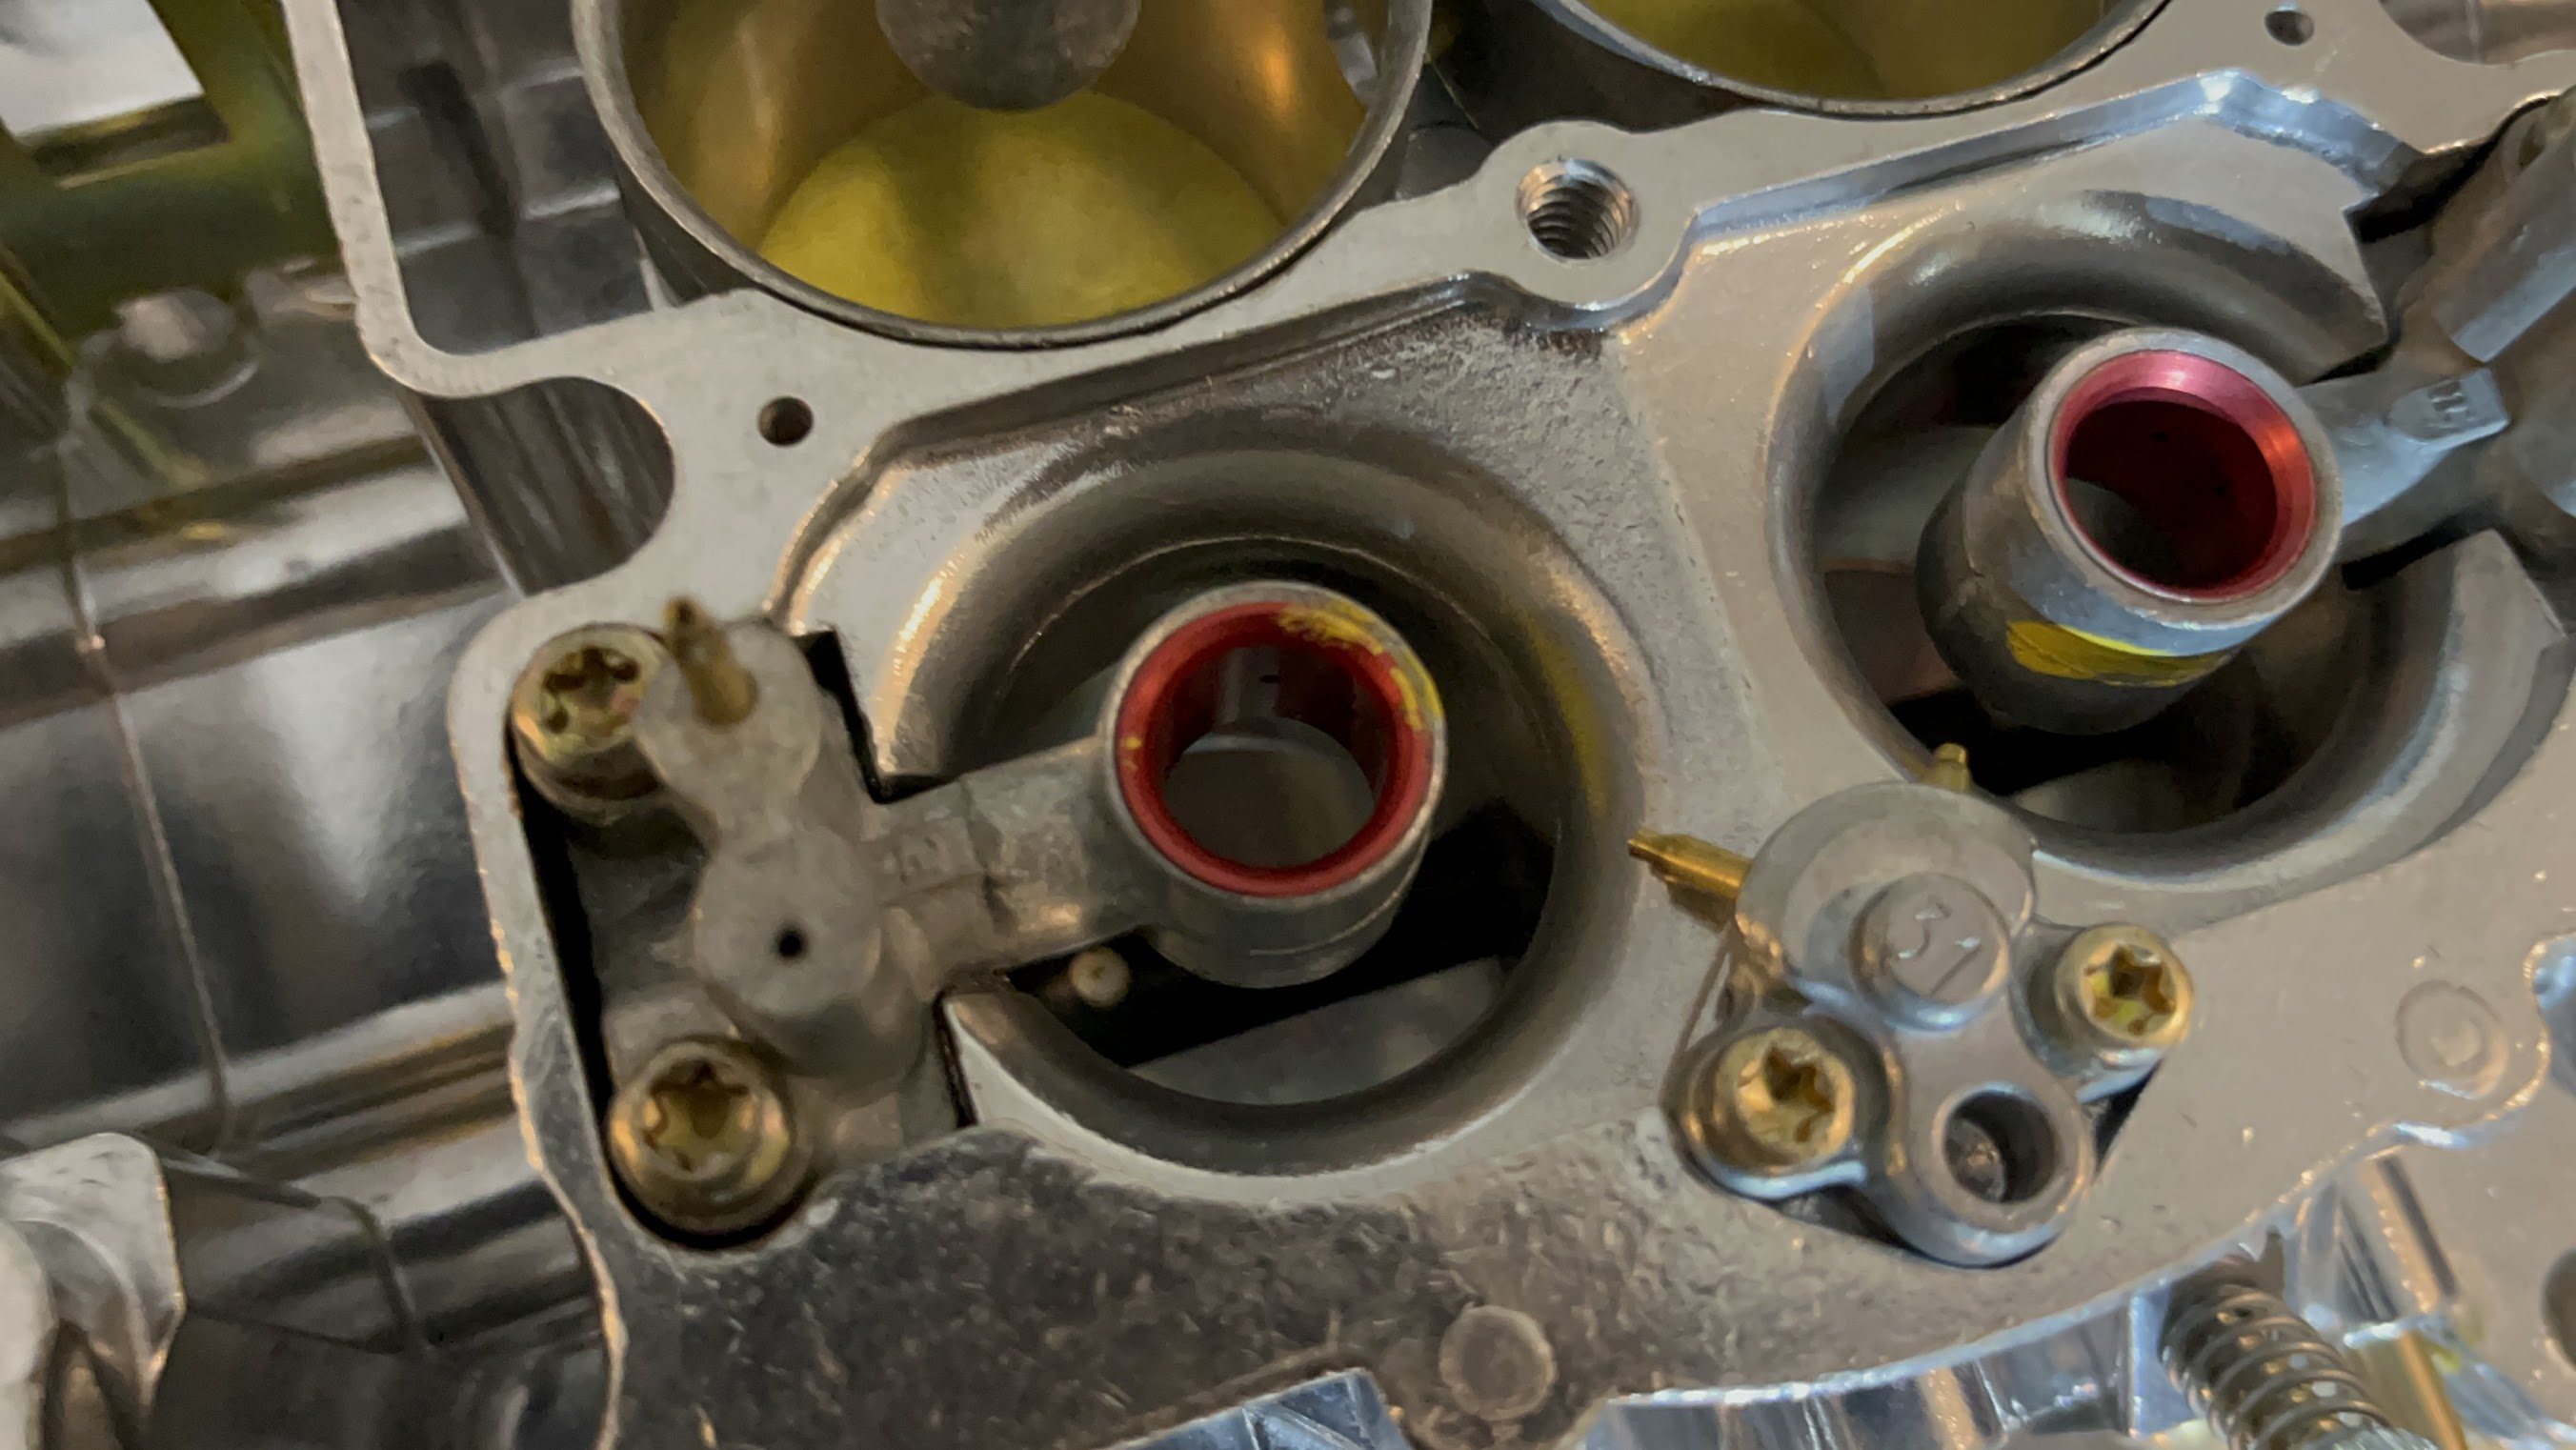
As the vacum leak was pulling in extra air I had my 1906 Edelbrock running max rich (biggest jets, slimmest rods) - I'm going to start by dropping in a much fatter rod
- Completed
- Aug 31, 2026
- Updated
- Aug 31, 2026
Parts
Edelbrock Metering Rod Set – Lean/Fat Assortment for Performer SeriesPart number: 1478Manufacturer or supplier: Demon Tweeks (ships to NL)Quantity: 1
Edelbrock 1478 is the metering rod assortment specifically for Performer Series carbs including the 1906. Gives you a full range of step-up rod diameters to dial in cruise and WOT mixture after removing the vacuum-lean compensation. Essential for iterative tuning.
Edelbrock Jet Assortment Kit – Performer SeriesPart number: 1439Manufacturer or supplier: AutoDoc NLQuantity: 1
Edelbrock 1439 jet assortment covers sizes 0.095" to 0.110" – now that the vacuum leak is fixed you may find the previously maxed-out jets are now too large. Having a full set lets you step down in 0.002" increments to find the correct street tune AFR of ~14.0–14.7:1.
Edelbrock Carburetor Gasket & Rebuild Kit for 1906Part number: 1477Manufacturer or supplier: RockAuto (ships to NL)Quantity: 1
Edelbrock 1477 rebuild/tune kit includes gaskets, needle & seat, and accelerator pump. Since the carb was running at extremes during the vacuum leak period, replacing the accelerator pump diaphragm and float bowl gasket now is cheap insurance and prevents new air leaks at the carb itself.
Inline Fuel Filter – 3/8" Barb, 5 Micron (Carb-Safe)Part number: FG-1Manufacturer or supplier: Oldtimer-Center NL / WebshopQuantity: 1
Fuel line/filter is listed as 'check and specify' in the build data. A fresh inline filter before the carb is essential during retuning – debris from the disturbed intake/fuel line during the vacuum leak repair can clog the needle & seat and cause false lean/rich readings. Use a clear-body unit so you can visually confirm flow.
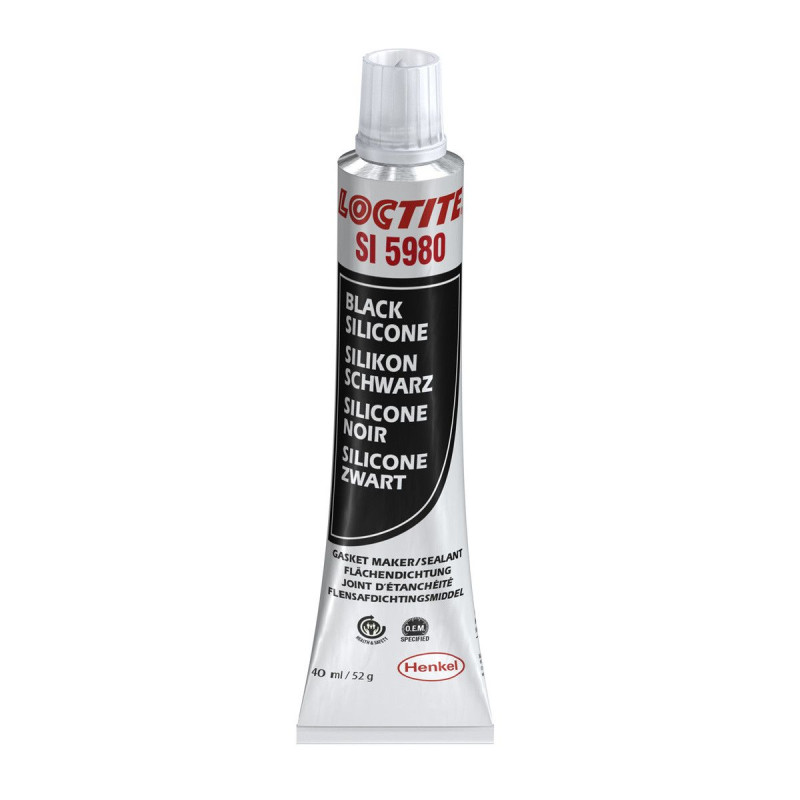
Permatex Ultra Copper High-Temp RTV Silicone (for intake re-torque check)Part number: 81878Manufacturer or supplier: Halfords NL / bol.comQuantity: 1
The intake was reseated to fix the vacuum leak – a small tube of Ultra Copper is needed at the front and rear intake end seals (common leak points on 302 V8 with Edelbrock intakes). Confirm the repair is fully sealed before finalising the carb tune, otherwise AFR readings will remain inconsistent.
completedtuning#ignition#MSD#performance#timing
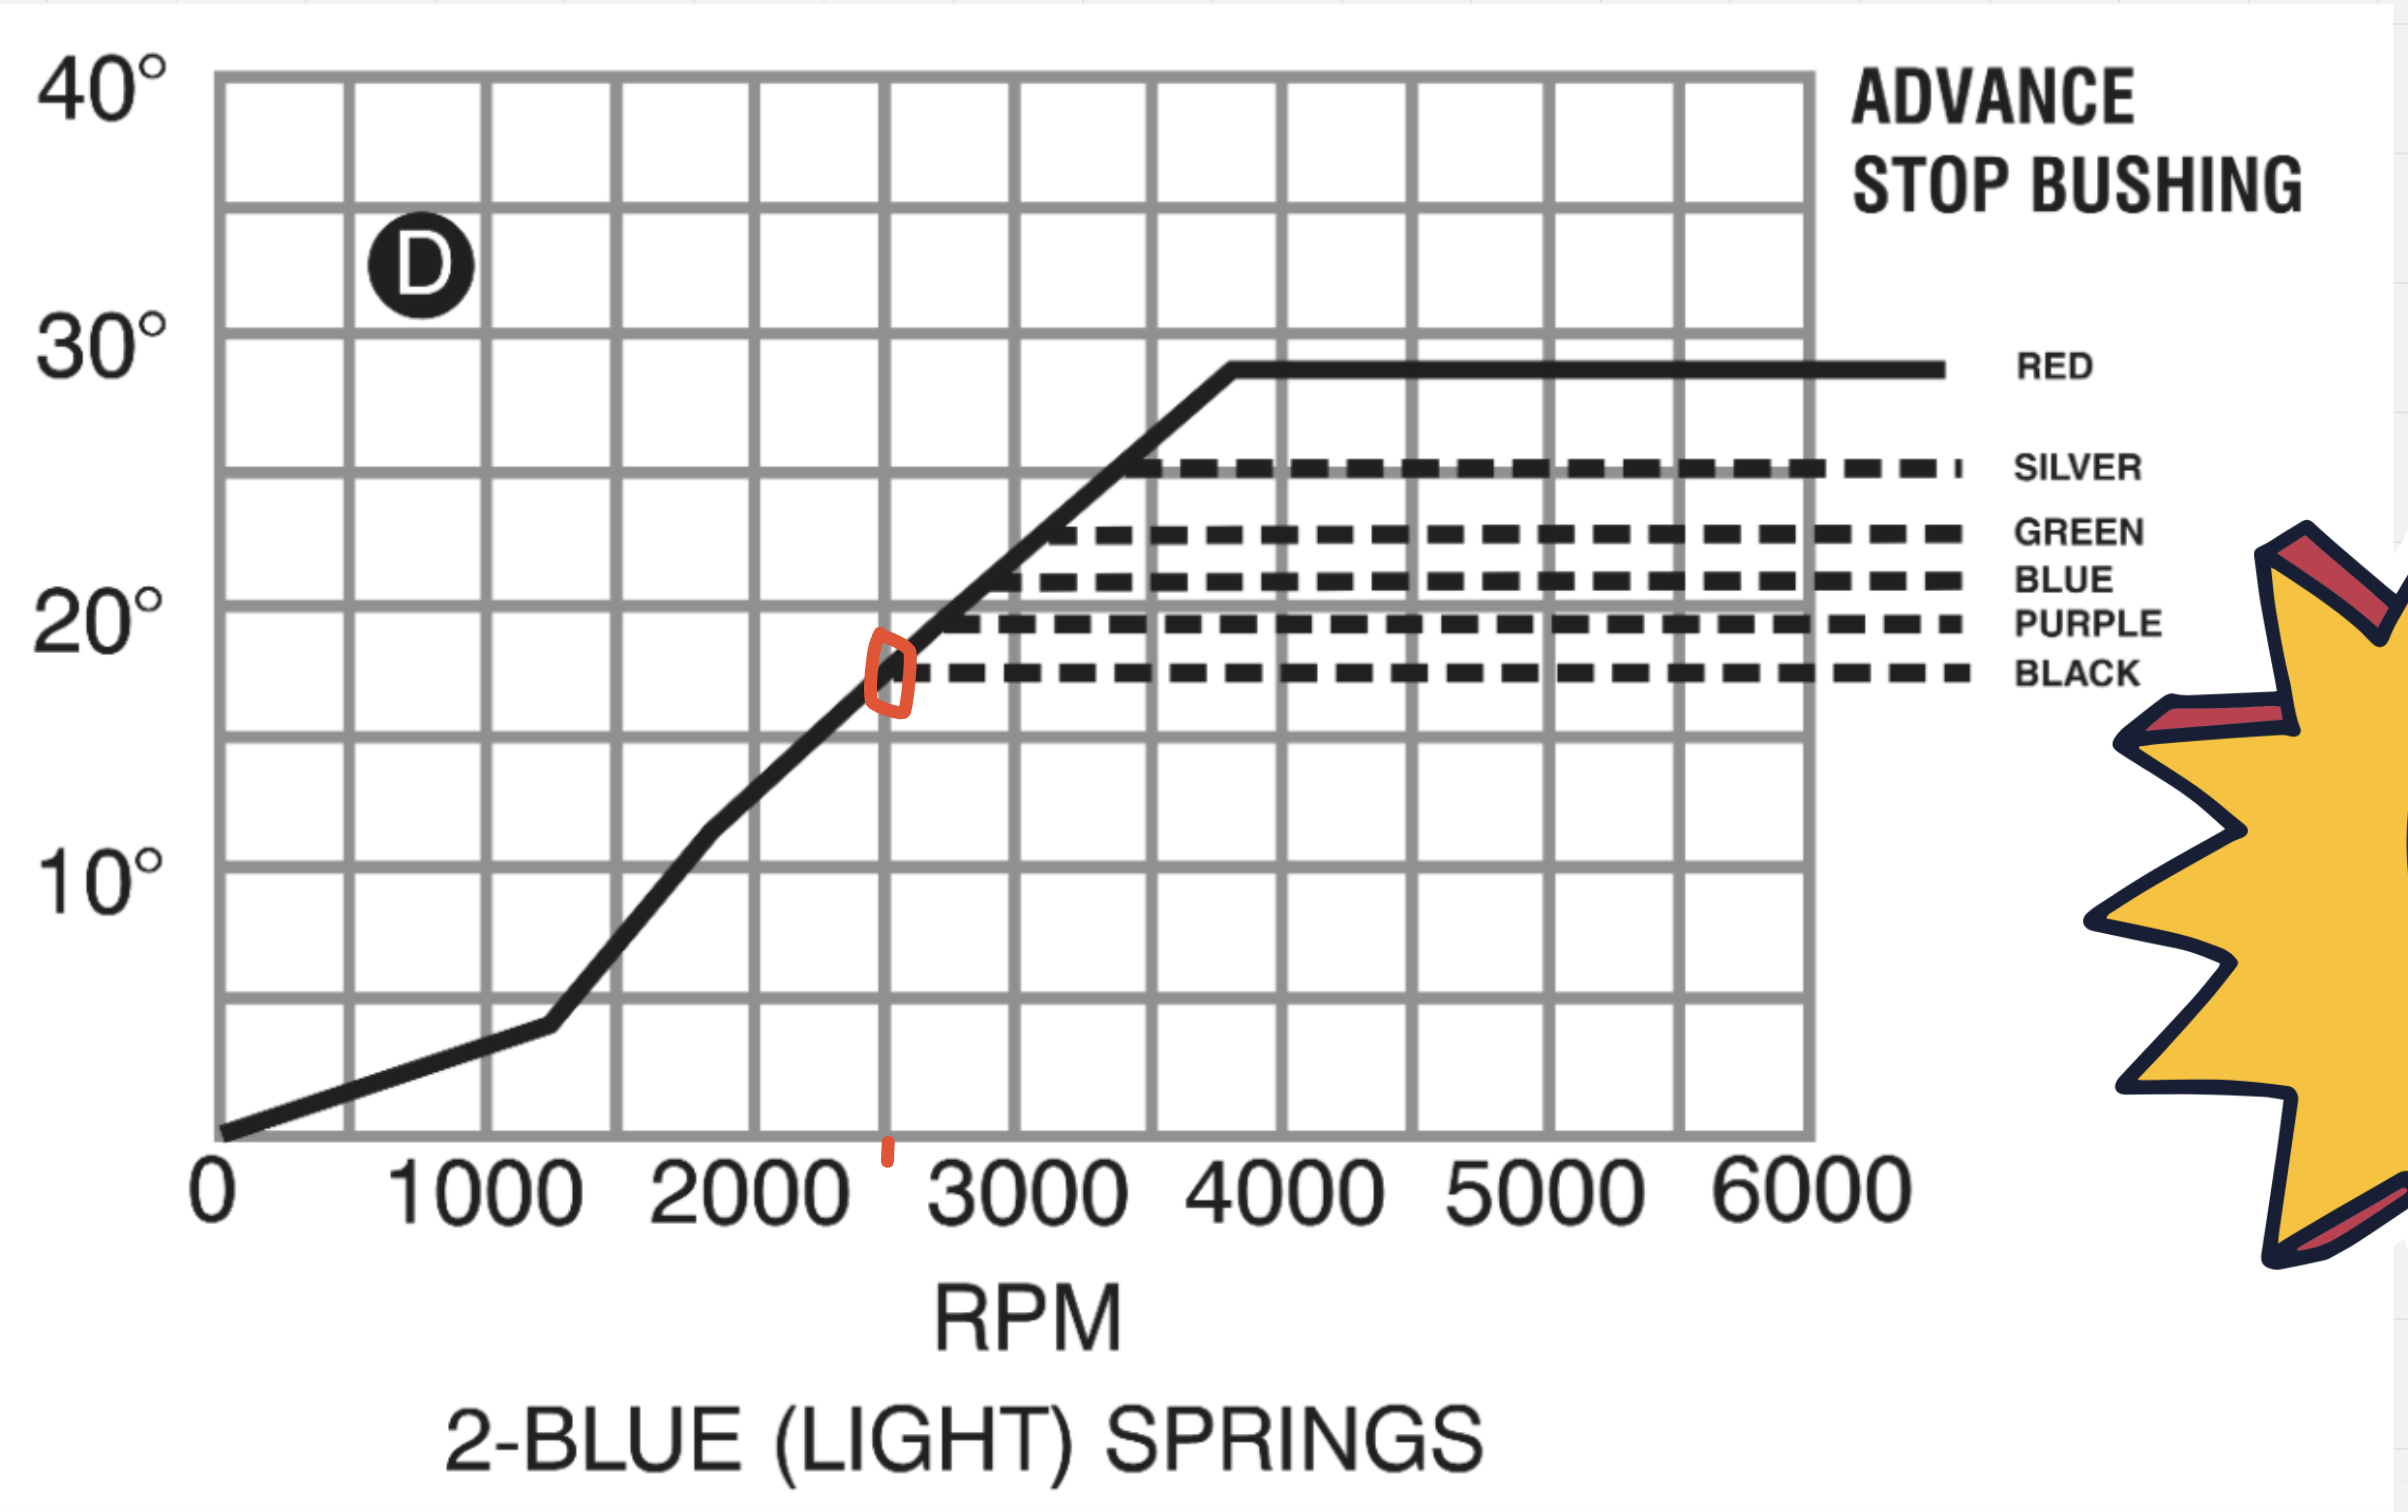
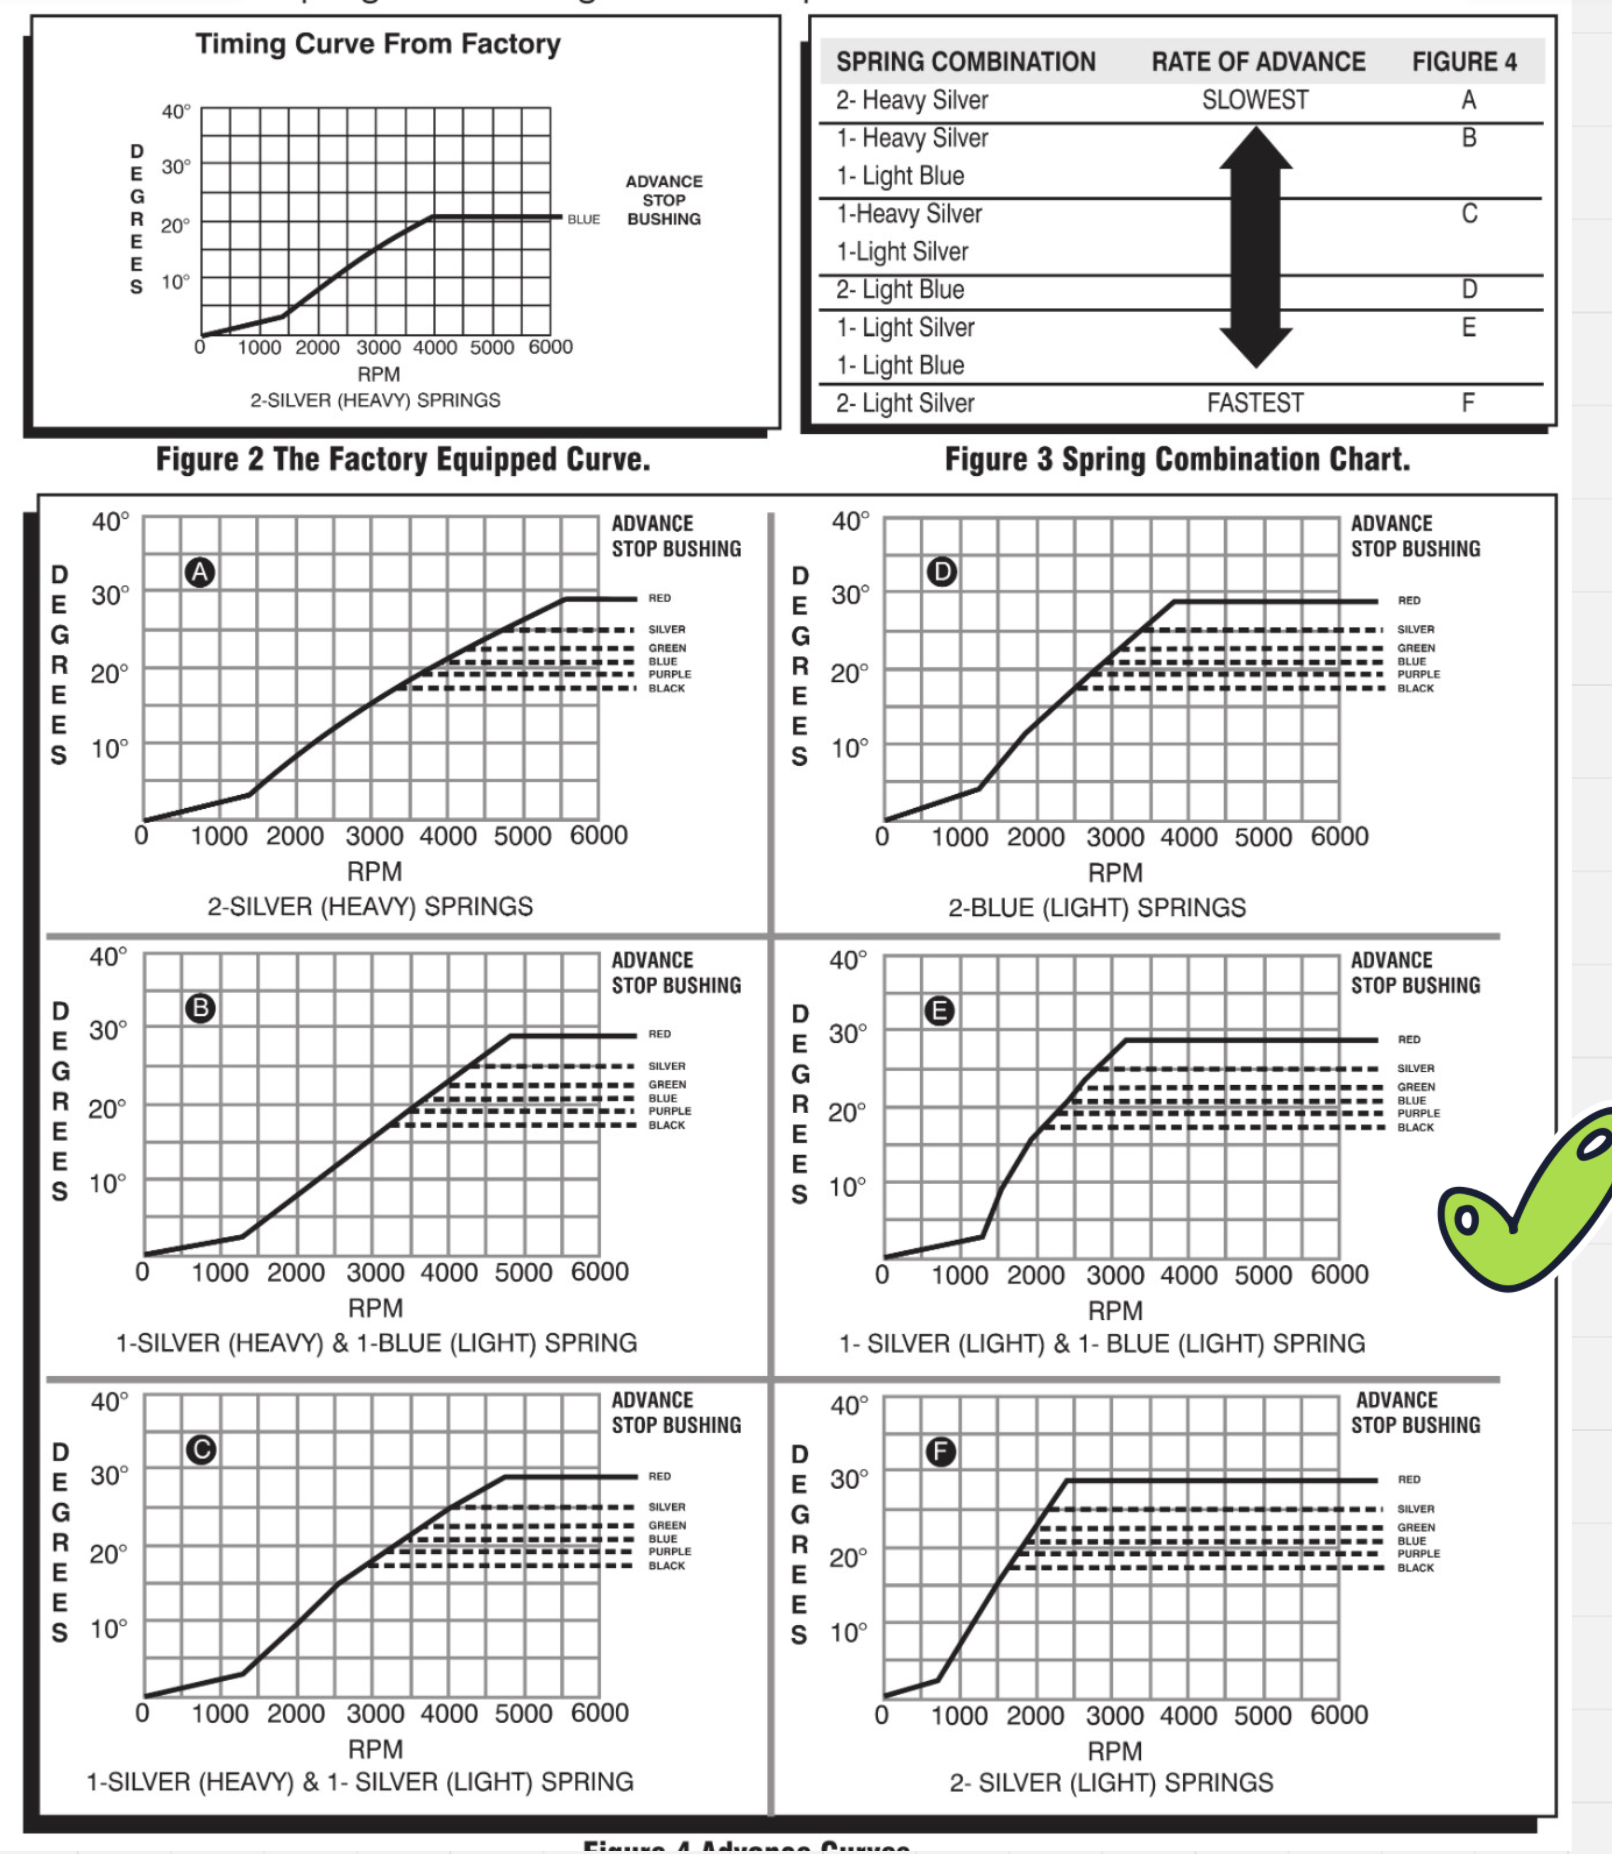
Dial In Ignition Timing & Verify MSD Setup
With the carb retune actively in progress and AFR readings showing rich conditions across all throttle positions (especially 9-10s at WOT with a bog), ignition timing is the critical missing piece of the puzzle. Initial timing, total advance, and the MSD unit configuration are all listed as 'check and specify' — without knowing these values, carb tuning is guesswork. Correct ignition timing directly impacts power, throttle response, and fuel efficiency, and is essential to unlocking the performance potential of the freshly rebuilt 302.
- Updated
- Aug 30, 2026
todotuning#camshaft#engine#performance#tuning
Identify & Document Camshaft Specs for Tuning Baseline
The camshaft is currently listed as 'check and specify' — without knowing the cam specs (lift, duration, LSA), neither the carb tune nor the ignition timing can be properly optimised for this engine. Cam specs directly dictate the ideal idle vacuum, timing curve, and carburetor calibration needed to make this 302 fast and responsive. Pull the valve covers or check for any existing documentation/stamps to identify the grind, then dial in the rest of the tune around it.
- Updated
- May 14, 2026
completedessential maintenance#maintenance
Spark Plug Inspection & Gap Check
With the MSD ignition system, active carb retune, and rich AFR readings across all throttle positions, spark plugs are under significant stress and can foul quickly. Regular inspection ensures the plugs are reading correctly for the tune and helps diagnose combustion issues — especially important while WOT bog and rich conditions are still being resolved on this freshly rebuilt 302.
Triggered by odometer due at 39500.
- Completed
- May 14, 2026
- Updated
- May 14, 2026
Parts
NGK V-Power Spark Plug - Heat Range 5 (BKR5E) - Set of 8Part number: BKR5EManufacturer or supplier: AutoDoc NLQuantity: 8
Correct heat range for a mildly built 302 with MSD ignition running rich. Hotter than stock to resist fouling under rich AFR conditions. Copper core reads combustion colour well for diagnostic inspection. Gap to 0.040" with MSD. Check colour after short run — sooty black confirms rich condition.
NGK Standard Spark Plug - Heat Range 4 (BKR4E) - Set of 8Part number: BKR4EManufacturer or supplier: AutoDoc NLQuantity: 8
Alternative hotter heat range option if BKR5E still foul under persistent rich conditions. Only step up to these if plugs continue to carbon-foul after carb corrections. Buy as a backup set — cheap insurance during active tuning phase.
Spark Plug Gap Tool - Feeler Gauge / Coin-Style GapperManufacturer or supplier: Halfords NL / Toolstation NLQuantity: 1
Essential for this job. MSD systems fire harder and benefit from a slightly wider gap — typically 0.040–0.045" (1.0–1.1mm) on a stock-ish 302. Coin-style gapper is more accurate than wire gauges for tapered-seat plugs. Confirm gap before reinstall every time.
Anti-Seize Compound - Copper Based, Small TubeManufacturer or supplier: Würth NLQuantity: 1
Apply sparingly to plug threads before reinstall into cast iron heads. Prevents galling and makes future removal much easier — especially important on a freshly rebuilt engine still going through heat cycles. Do NOT apply to electrode end.
Dielectric Grease - Small Sachet or TubeManufacturer or supplier: Conrad NL / AutoDoc NLQuantity: 1
Apply inside spark plug boot before reinstalling HT leads. Prevents boot from bonding to the plug insulator and protects against moisture and arcing — important with MSD HT leads under high voltage. Small tube goes a long way across 8 cylinders.
NGK V-Power Spark Plug - Heat Range 6 (BKR6E) - Set of 8Part number: BKR6EManufacturer or supplier: AutoDoc NLQuantity: 8
One heat range hotter than BKR5E — recommended as a diagnostic swap given persistent rich condition and potential fouling. Hotter plug burns off carbon deposits better under rich running. If plugs are reading sooty black on BKR5E, trial these before re-gapping. Gap to 0.035" (0.9mm) for MSD systems.
Permatex Plug Wire Grease / Spark Plug Boot Protector SprayPart number: 22058Manufacturer or supplier: AutoDoc NLQuantity: 1
With MSD plug wires on a hot V8, boot sealing is critical. Prevents carbon tracking and boot adhesion to plug ceramic — essential when pulling plugs regularly during active tuning. Apply to inside of boot before reinstalling.
Torque Wrench Adapter - 5/8" Spark Plug Socket (3/8" Drive)Manufacturer or supplier: Toolstation NLQuantity: 1
Fresh top-end rebuild means correct torque on re-installation is critical — aluminium heads especially. Ford 302 cast iron heads: 25–30 Nm. A quality 5/8" plug socket with rubber insert protects plug ceramic during removal and re-fit. Check you have a 3/8" drive torque wrench available.
Compressed Air Can / Blow Gun - For Plug Well CleaningManufacturer or supplier: Conrad NLQuantity: 1
Essential before removing plugs on a recently rebuilt engine — blow out plug wells to prevent debris falling into combustion chambers. Especially important given this engine is fresh and any contamination should be avoided.
Spark Plug Reading Reference Card / Colour ChartManufacturer or supplier: NGK (Free Download / Print)Quantity: 1
Free NGK plug reading guide — critical for this job since the primary goal is diagnosing combustion condition from plug colour and deposits. With rich AFRs across all throttle positions, expect sooty black carbon fouling. Document plug condition per cylinder to identify any outliers suggesting mechanical issues post-rebuild.
todoessential maintenance#maintenance
Brake Fluid Flush & System Bleed
With a full front disc conversion underway — new master cylinder, new lines, and a proportioning valve all being installed — a full brake fluid flush and bleed of the completed system is essential before the car returns to street use. Brake fluid in a classic of this age absorbs moisture rapidly, reducing boiling point and compromising pedal feel and safety.
Triggered by odometer due at 38500.
- Updated
- May 14, 2026
completedessential maintenance#maintenance
Engine Oil & Filter Change – Post-Rebuild
With only 1000–2000 km on the refreshed top end, an early oil change is critical to flush break-in contaminants, metal particles, and any residue from the valve lash and intake work. Running a carbureted 302 that is currently tuning rich increases the risk of fuel dilution in the oil, making regular changes especially important during this period.
Triggered by odometer due at 39000.
- Updated
- Aug 30, 2026
todoessential maintenance#maintenance
Spark Plug Inspection & Gap Check
With the MSD ignition system, active carb retune, and rich AFR readings across all throttle positions, spark plugs are under significant stress and can foul quickly. Regular inspection ensures the plugs are reading correctly for the tune and helps diagnose combustion issues — especially important while WOT bog and rich conditions are still being resolved on this freshly rebuilt 302.
Triggered by odometer due at 39500.
- Updated
- May 14, 2026
todocustom improvement
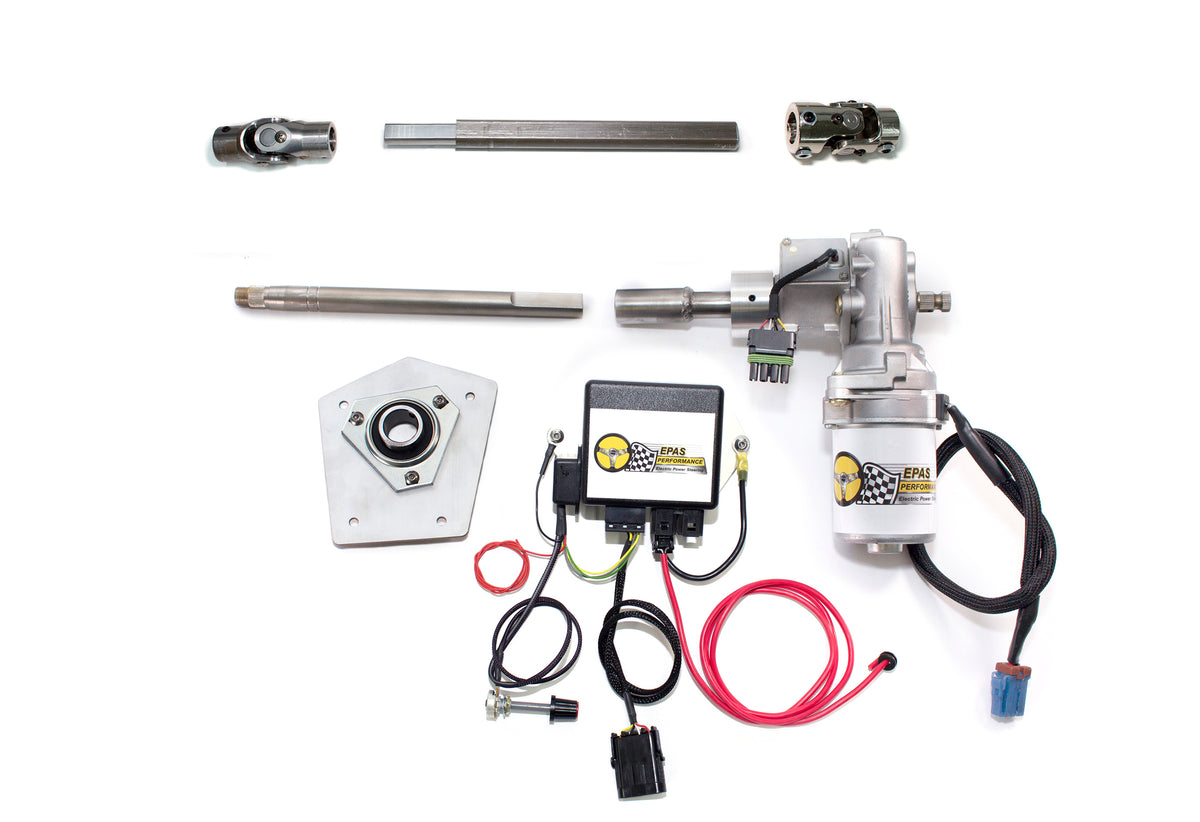
Add power steering
looking at electric kits such as the EPAS perfomance kit
https://www.vintage-mustang.com/threads/epas-vs-stock-power-steering.1228912/
- Updated
- May 20, 2026
Parts
Steering Column Intermediate Shaft / Rag Joint Rebuild KitPart number: K8708Manufacturer or supplier: AutoDoc (NL)Quantity: 1
The original rag joint (rubber coupling) on the 1967 Mustang steering column is often worn and should be replaced when fitting EPAS. A worn rag joint will give vague steering feel even with new power assist. Check fitment for 1967 Ford Mustang on AutoDoc.
Steering Column Lower Bearing & Seal KitPart number: SB107Manufacturer or supplier: CJ Pony Parts (USA, ships to NL)Quantity: 1
When the column is dropped to install the EPAS motor, it's the ideal time to replace the lower column bearing. Common wear item on 57-year-old Mustangs. Prevents slop and rattle after reassembly.
Relay & Fuse Holder Kit (30A inline, for EPAS power feed)Part number: RFL-30AManufacturer or supplier: Conrad Electronic (NL)Quantity: 1
The EPAS kit requires a dedicated 12V power feed directly to the battery with appropriate fusing (typically 25-30A). A quality relay and inline fuse holder is needed for a clean, safe install. Available locally at Conrad or any automotive electrics supplier in NL.
Steering Wheel Hub Adapter / Quick Release (optional, for column reassembly clearance)Part number: 67-MUSTANG-HUBManufacturer or supplier: Mustang Depot Europe (NL/EU)Quantity: 1
Depending on your current steering wheel setup, the EPAS motor added to the column may require a slim hub adapter to maintain correct steering wheel position and clearance. Mustang Depot Europe is NL-based and stocks classic Mustang parts — worth contacting directly for availability.
todo
Get better seats
Currently running the stock seats, with original foam and some 20 yeard upholstery... Driving the car is uncomfortable at best, lower backpain and neck tension result from anything longer than 10 minutes in the car. Lookin at improvements after market seats like the proc car range or maybe a used euro seat as I'm in NL - eg BMW E30 seats... cost is a constraint.
- Updated
- May 24, 2026
in progresscustom improvement
Run a new return line
I determined that the old return line was way too small at 5/16. It ended up creating that noise that I was trying to find for a long time, like a banging noise at idle. I proved that it's the case by installing a rubber line and eliminating the noise. Now I've decided to run a new line, but the rubber is no good because it needs to be routed underneath the car. Stainless steel is the way to go. It's much more sturdy, so that's what I'm going to go with.
- Updated
- Sep 12, 2026
todoessential maintenance#maintenance
Carburetor Fuel Filter Replacement
The Edelbrock 1906 is sensitive to debris and varnish, and the fuel line and filter spec is currently unverified on this build. A fresh inline filter protects the carb's needle and seat, jets, and metering rods from contamination, particularly important while active retuning is ongoing.
Triggered by date due 2026-08-13.
- Updated
- Aug 13, 2026
todoessential maintenance#maintenance
Front Suspension & Steering Inspection
The 1967 Mustang's front suspension and steering components are of unknown condition and age, and a full wheel alignment is already flagged as needed after the disc brake conversion. Inspecting ball joints, tie rod ends, control arm bushings, and front shocks at this stage ensures the car is safe and handles predictably before regular street driving resumes.
Triggered by date due 2026-08-13.
- Updated
- Aug 13, 2026
completedessential maintenance#DIY#engine#rebuild#restoration
Rebuild Ford 302 engine
Complete DIY rebuild and installation of the Ford 302. A machine shop handled the block machining and bored the cylinders 0.020 inch over; the remainder of the engine build and installation was completed by the owner. This was the central restoration job and led to extensive post-installation work and tuning.
- Started
- Aug 1, 2023
- Ended
- Aug 1, 2024
- Completed
- Aug 1, 2024
- Updated
- Aug 30, 2026
completedcustom improvement#exhaust#Flowmaster#headers
Install full-length headers and Flowmaster exhaust
Installed full-length headers and a Flowmaster exhaust system as part of the post-engine-installation work.
- Updated
- Aug 30, 2026
completedessential maintenance#fuel-lines#fuel-system
Replace fuel lines
Installed new fuel lines during the engine-build and post-installation work.
- Updated
- Aug 30, 2026
completedcustom improvement#instrumentation#interior#tachometer
Install Mooneyes tachometer
Installed a Mooneyes tachometer to monitor engine speed.
- Updated
- Aug 30, 2026
completedcustom improvement#distributor#ignition#MSD
Install MSD distributor
Installed an MSD distributor as part of the rebuilt engine's ignition system.
- Updated
- Aug 30, 2026
completedtuning#carburetor#Edelbrock#tuning
Install and tune 550 CFM Edelbrock carburetor
Installed a 550 CFM Edelbrock carburetor and tuned the initial engine setup.
- Updated
- Aug 30, 2026
completedcustom improvement#090821-RPE560#Coldcase#cooling#radiator
Install Coldcase aluminum radiator
Installed a Coldcase aluminum radiator, part number 090821-RPE560.
- Updated
- Aug 30, 2026
completedcustom improvement#cooling#fan#fan-clutch
Install cooling fan and fan clutch
Installed a cooling fan and fan clutch to complete the upgraded engine cooling system.
- Updated
- Aug 30, 2026
completedcustom improvement#carburetor#Edelbrock#performance
Upgrade to 650 CFM Edelbrock carburetor
Upgraded the engine from the earlier 550 CFM carburetor to a 650 CFM Edelbrock carburetor.
- Updated
- Aug 30, 2026
completedessential maintenance#leaf-springs#rear-suspension#suspension
Replace rear leaf springs
Installed new rear leaf springs.
- Updated
- Aug 30, 2026
completedtuning#AFR#gauge#sensor#tuning
Install AFR sensor and gauge
Installed an air-fuel-ratio sensor and gauge to support accurate carburetor tuning.
- Updated
- Aug 30, 2026
completedtuning#AFR#carburetor#tuning
Tune carburetor using AFR readings
Tuned the carburetor using live AFR gauge readings to refine the fuel mixture across operating conditions.
- Updated
- Aug 30, 2026
completedcustom improvement#Borla#catalytic-converters#exhaust#noise-reduction
Replace Flowmaster Super 44 mufflers with Borlas and add sports catalytic converters
Replaced the Flowmaster Super 44 mufflers with Borla mufflers and installed sports catalytic converters to reduce exhaust noise and smell.
- Updated
- Aug 30, 2026
completedessential maintenance#front-suspension#springs#suspension
Refresh front suspension and install new front springs
Refreshed the front suspension and installed new front springs before the engine rebuild.
- Updated
- Aug 30, 2026
completedessential maintenance#steering#steering-box
Replace steering box
Replaced the steering box before the engine rebuild.
- Updated
- Aug 30, 2026
completedessential maintenance#heater#heater-core#HVAC
Replace heater core and rebuild heater box
Replaced the heater core and rebuilt the heater box.
- Updated
- Aug 30, 2026
completedcustom improvement#carpet#dashboard#interior#ventilation
Refresh interior, dashboard and ventilation ducting
Refreshed the interior with new carpet, a new dashboard, and new ventilation ducting.
- Updated
- Aug 30, 2026
completedcustom improvement#15-inch#BFGoodrich#tires#wheels
Upgrade to 15-inch wheels and BFGoodrich tires
Upgraded the Mustang to 15-inch wheels and installed new BFGoodrich tires.
- Updated
- Aug 30, 2026
completedessential maintenance#clutch#Rudys-Muscle-Cars#T10#transmission
Rebuild T10 gearbox and install new clutch
The T10 gearbox was professionally rebuilt and a new clutch was installed by Rudy's Muscle Cars.
- Updated
- Aug 30, 2026
todoessential maintenance#maintenance
Engine Oil & Filter Change – Post-Rebuild
With only 1000–2000 km on the refreshed top end, an early oil change is critical to flush break-in contaminants, metal particles, and any residue from the valve lash and intake work. Running a carbureted 302 that is currently tuning rich increases the risk of fuel dilution in the oil, making regular changes especially important during this period.
Triggered by date due 2026-06-13.
- Updated
- Aug 31, 2026
in progresscustom improvement#air-cleaner#crankcase-ventilation#Edelbrock#fuel-smell#PCV
Resolve fuel/oil vapour smell and complete air-cleaner breather connection
# Resolve fuel/oil vapour smell and complete air-cleaner breather connection
Vehicle: 1967 Ford Mustang Coupe — AutoSQD project 1
Proposed status: todo
Category: custom-improvement
Tags: air-cleaner, crankcase-ventilation, PCV, fuel-smell, Edelbrock
Budget: not set; historical supplier quotes are not current prices.
## Background and objective
Rebuilt Ford 302 V8 with Edelbrock E-Street top end, Performer RPM intake, AVS2 1906 650 CFM carburettor and MSD ignition, under the original flat bonnet. Strong petrol/hot-oil/filter smell was reported during acceleration and after shutdown, including fumes in the garage. The triangular Edelbrock Pro-Flo foam element appeared to collect fuel mist/oil contamination. Heat soak and crankcase vapours were suspected; neither was confirmed as the sole cause.
Replace the triangular foam arrangement with the round air cleaner, maintain closed crankcase ventilation, establish sufficient bonnet/component clearance, and compare smells and filter contamination before and after installation.
## Parts and measurements recovered from the conversations
- Edelbrock 1221 round chrome air-cleaner assembly with 3-inch paper element: identified as the current setup in the later conversation. Earlier alternative: 1224 with washable oiled cotton element. Confirm actual installed part before buying duplicates.
- Edelbrock 1205 air-cleaner breather adapter: connection at underside of air-cleaner base, opening into the filtered-air side.
- Edelbrock 4410 chrome breather cap with horizontal 90-degree outlet: explicitly confirmed by owner.
- Owner's final measured fitting OUTSIDE diameters: 21 mm at the 1205 and 13 mm at the 4410. These supersede earlier estimates of 17–18 and 14–15 mm.
- Required connection route: approximately 130–140 mm with a 45-degree bend; black hose preferred.
- FMIC black 45-degree reducing silicone elbow, 13/22 mm, code 004513-22-B: ordered; owner explicitly confirmed the 22 mm version on 20 October 2026.
Reference: https://fmic.eu/246744-silicone-reducer-elbow-45-13-22mm-black-004513-22-b.html
- Manufacturer description pasted by owner states resistance to fuel fumes, grease and engine oil, and mentions crankcase vents. Fluorosilicone lining was not established. Record as manufacturer claim from the conversation, not independently verified compatibility for liquid fuel/oil transfer.
- Two appropriately sized smooth-band hose clamps for a direct one-piece hose connection; choose clamp sizes using actual hose OUTSIDE diameters, including wall thickness.
- Spare new 3-inch paper element already in garage; verify inner/outer diameters and sealing profile before using.
## Installation / how-to checklist
1. With engine cool, inspect fuel hoses, pump, regulator/return line, carburettor inlet and fittings for liquid leakage or staining. Resolve any leak before road testing.
2. Photograph the existing layout and note baseline smell during driving, after shutdown and after parking; record whether the filter is wet or oily.
3. Confirm the installed round housing/element, correct carburettor seating and gasket, and secure mounting. Check full throttle and choke movement, fuel-fitting clearance, and space above air horn/bowl vents. Keep hardware and debris out of the carburettor.
4. Confirm the 1205 adapter is securely fitted to the intended base provision and communicates with filtered air. Confirm the 4410 cap/grommet and inspect baffling. Retain the separate PCV valve connection to the carburettor manifold-vacuum port: this new hose is the breather-to-air-cleaner connection, not a replacement for that PCV line.
5. Verify the ordered hose size. Dry-fit the 45-degree elbow between the 21 mm and 13 mm fittings. Mark cuts in situ and trim progressively, preserving adequate straight engagement and clamp support at both ends. Do not stretch the 19 mm alternative onto the 21 mm fitting without confirming permitted fit; a 22 mm end must clamp securely without folds or leakage.
6. Route without kinks, flattening or tension. Keep clear of exhaust heat, fuel lines, throttle/choke linkage and bonnet. Tighten clamps to hose/fitting requirements without damaging the hose or fittings. Confirm crankcase ventilation remains unobstructed.
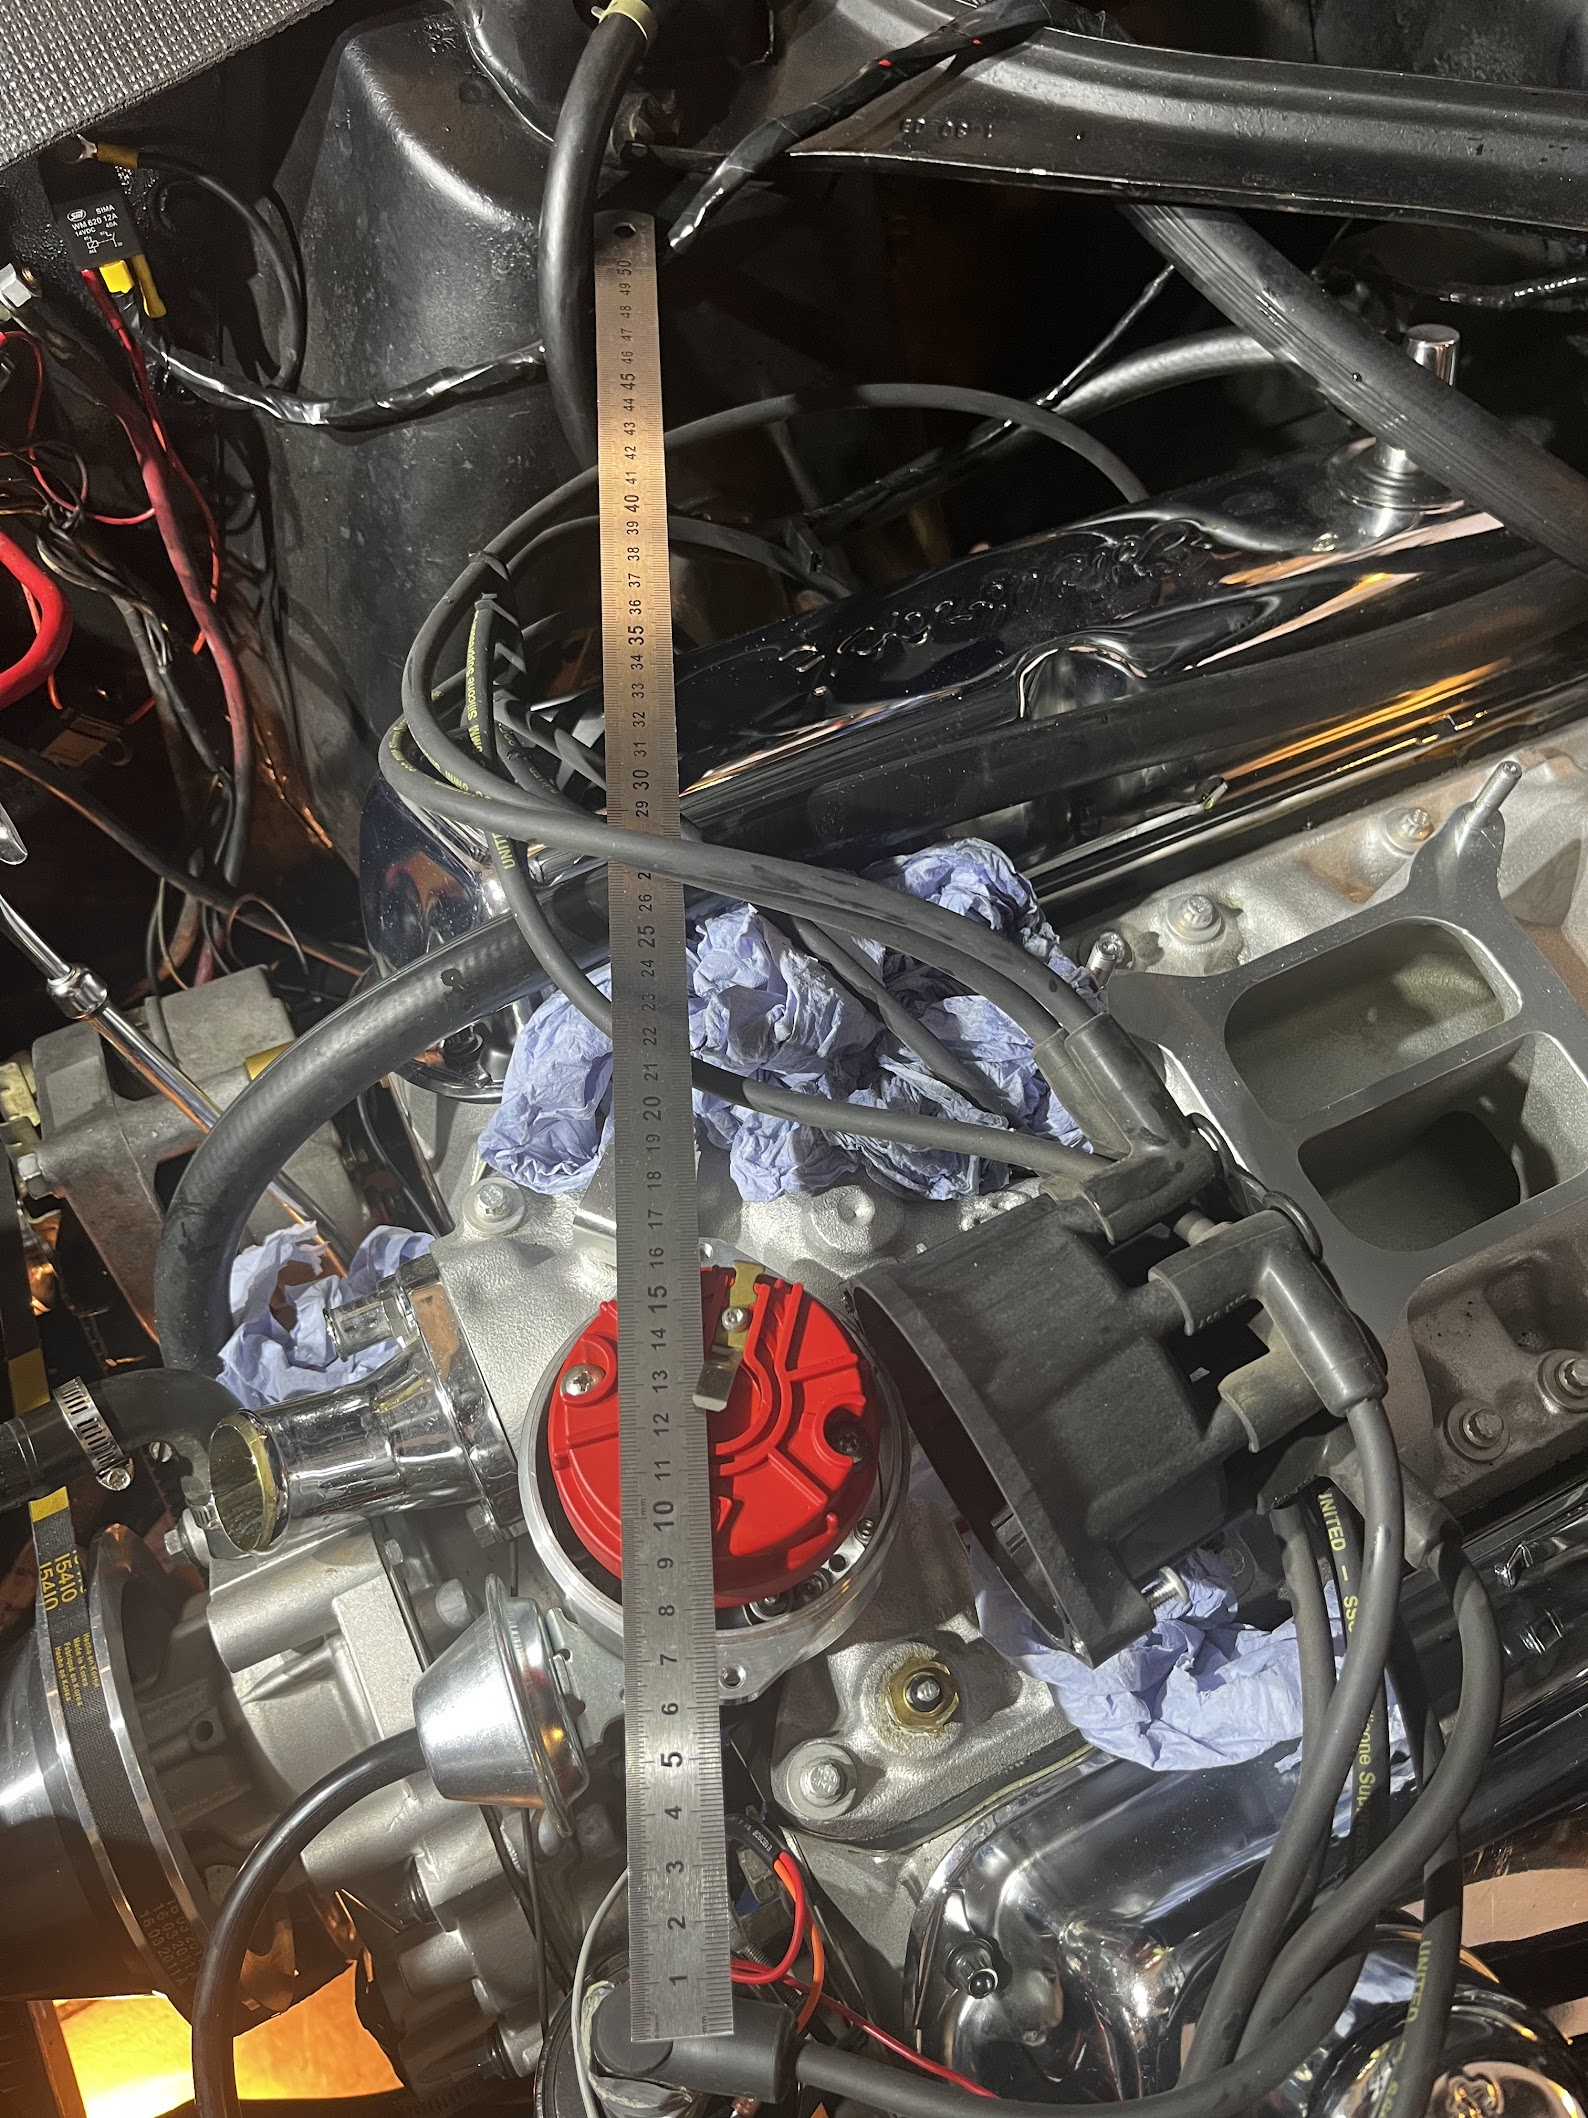
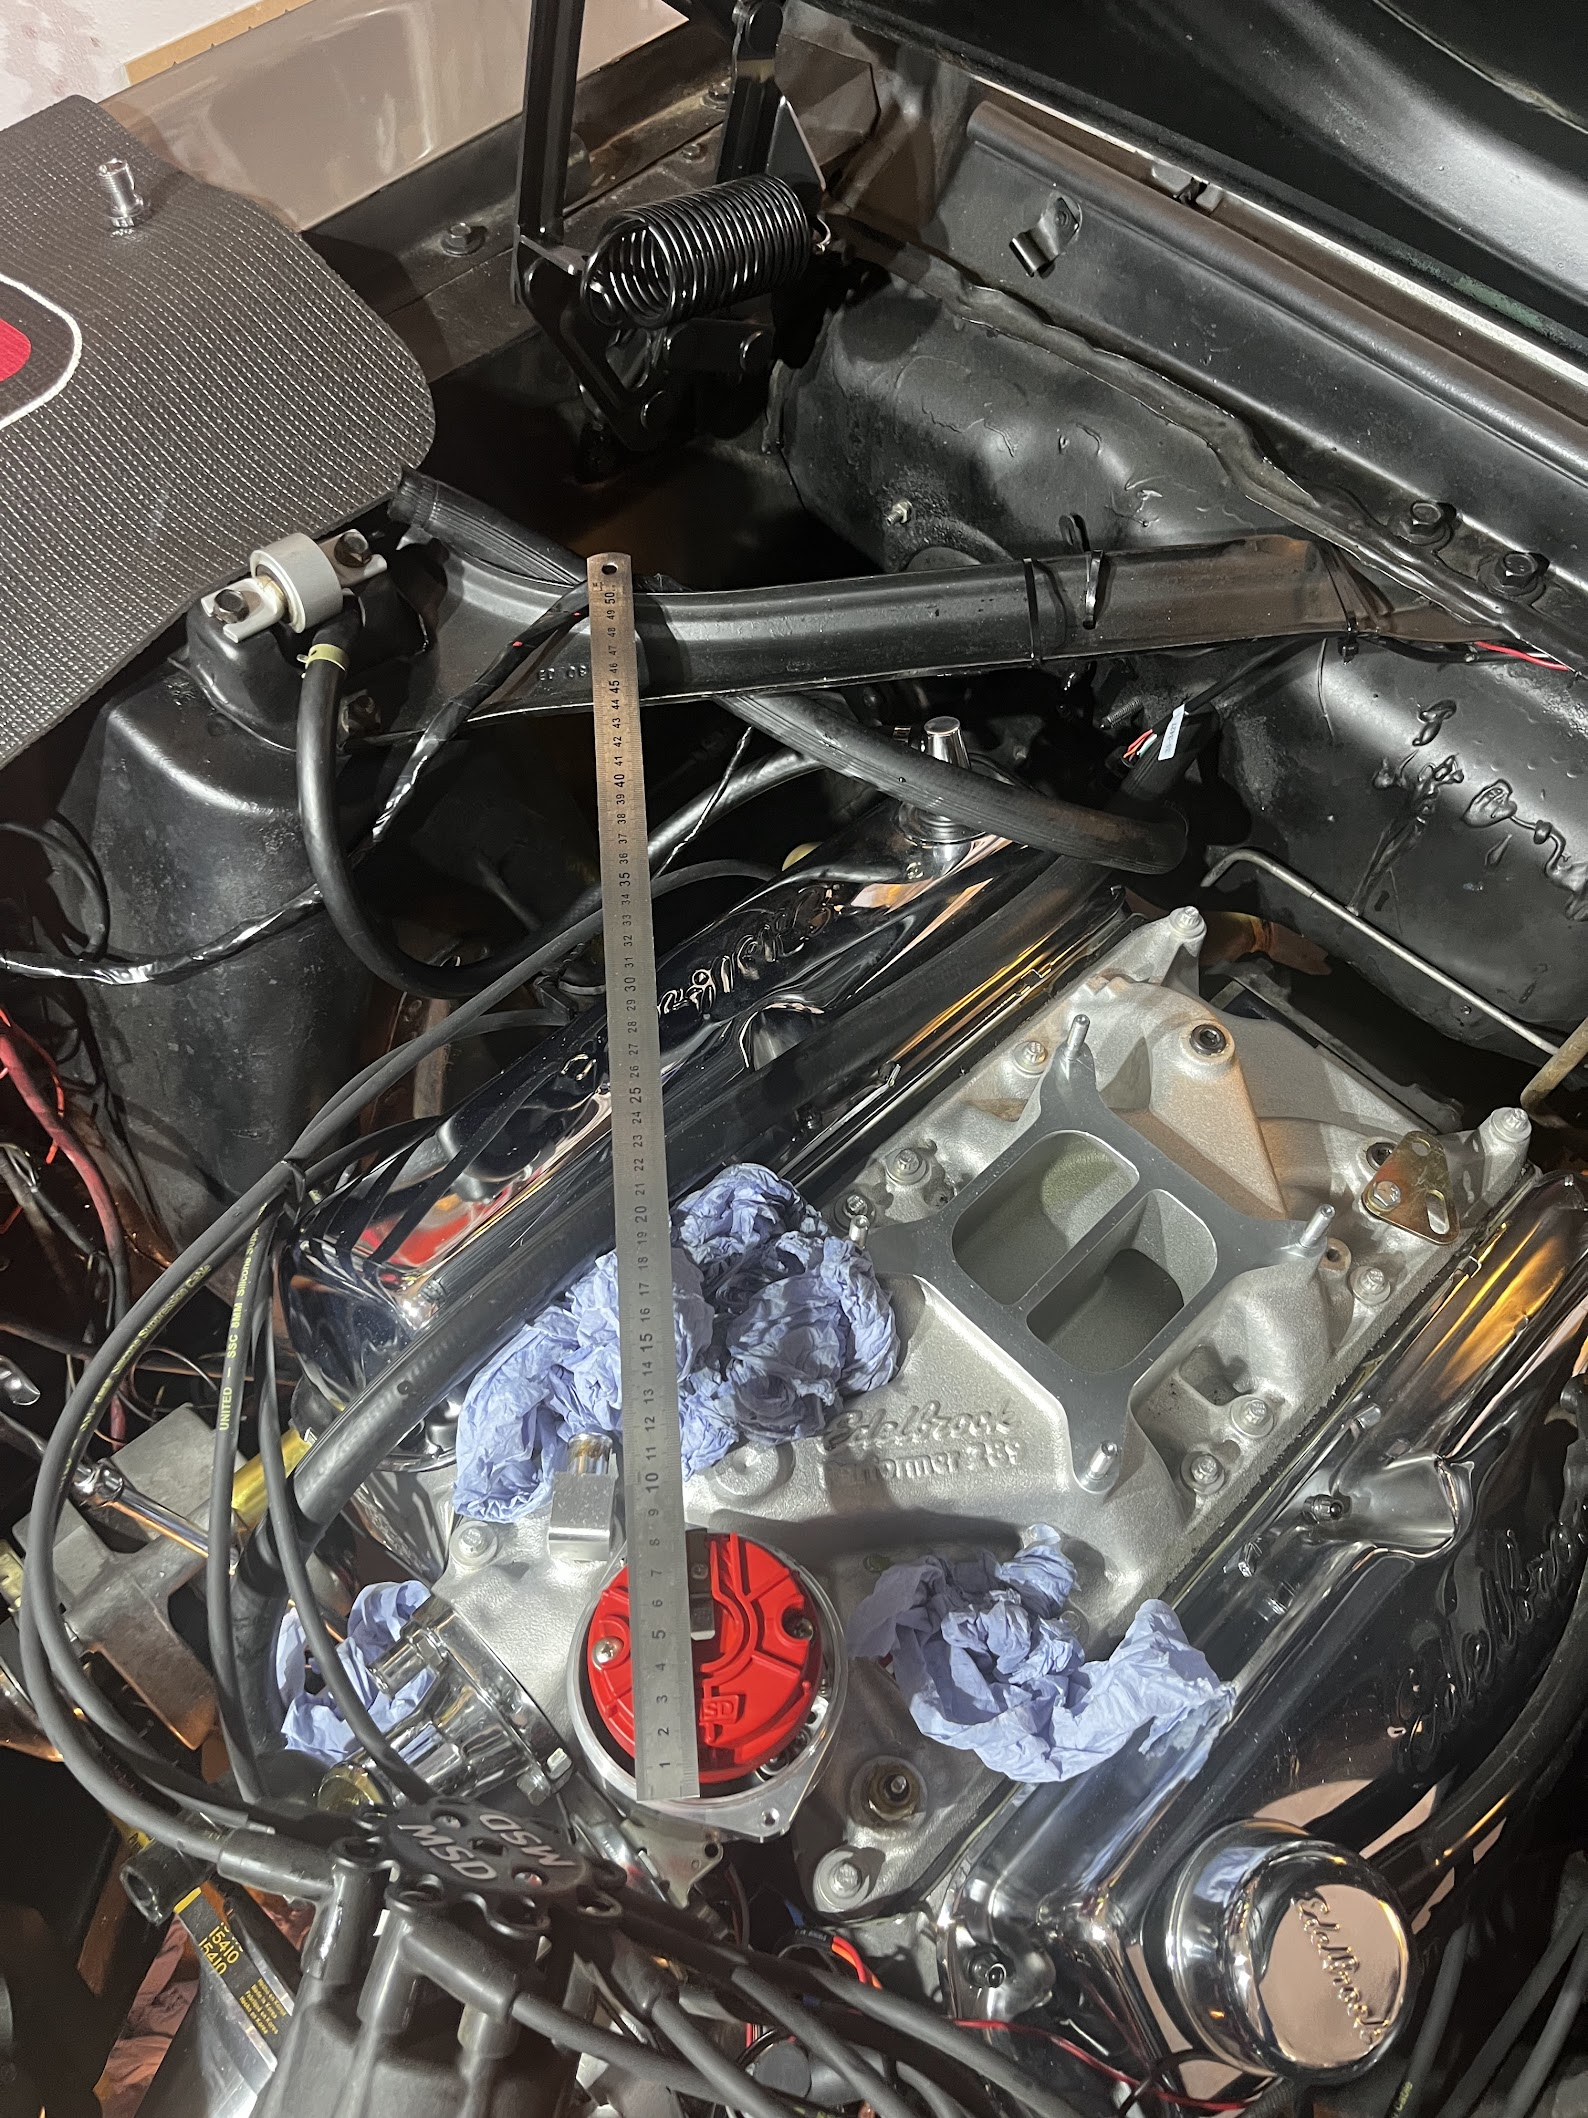
7. Measure final bonnet clearance at several points using a soft compressible clearance indicator, closing gently. Earlier original-style assembly measured 111 mm from support to top and had only 6–7 mm clearance. The discussion estimated approximately 22–23 mm with the 95.25 mm advertised 1221/1224 assembly height, assuming the same measurement datum. Treat this as an estimate; target approximately 20 mm and verify actual fit and allowance for engine movement.
8. Warm engine, inspect for leaks and hose collapse, check idle/PCV operation, then perform a controlled drive and shutdown comparison once fuel integrity and clearances are confirmed. Recheck clamps, filter dryness, oil mist and smell after heat cycles.
9. If smell persists, investigate measured fuel pressure against the AVS2 manual, float levels, choke operation and post-shutdown fuel percolation. Consider a roughly 5–6 mm insulating spacer/gasket only after verifying both compatibility and remaining bonnet clearance. Investigate excessive oil carryover before considering an oil separator.
## Alternative previously explored — not the latest purchase plan
A 16 mm OD × 1 mm wall bendable aluminium tube (14 mm ID), bent approximately 45 degrees, with 21/22-to-16 and 16-to-13 oil-vapour-compatible couplers and four clamps. Make a routing template, bend before trimming, deburr/clean thoroughly and preferably use retaining beads. Earlier suggestion: buy 200–250 mm stock and trim to fit; 90–100 mm finished length was only an initial estimate. The later one-piece FMIC hose avoids this assembly. Do not use the spare 3/8-inch OD fuel tube for this breather route.
## Completion evidence
Record actual installed part numbers, ordered elbow size, final hose routing/photo, measured bonnet clearance, filter condition after heat cycles, and change in smell during acceleration and after shutdown. Record unresolved heat-soak or oil-mist symptoms separately; do not mark the smell cured without testing.
Sources: ChatGPT chat “Mustang Fuel Smell Diagnosis” (6aca61f4-3d20-83eb-a1ba-0cfcae9e2560); Codex chat “Diagnose Mustang fuel vapour smell” (01a12a3b-c6c9-7462-847b-0b321b83f2a5), including its attached handover. This draft consolidates prior discussion; no new parts prices or fitment guarantees have been added.
- Updated
- Oct 20, 2026